Delicate Pear & Vanilla Bean Bliss Tart Recipe
Introduction
Tarts have long held a cherished place in the world of desserts, captivating both amateur bakers and seasoned pastry chefs alike. Their versatility allows for a delightful exploration of flavors and textures, making them an ideal canvas for seasonal ingredients. Among the myriad of tart recipes, the Delicate Pear & Vanilla Bean Bliss Tart stands out as a sophisticated yet accessible option. This dessert not only showcases the natural sweetness of ripe pears but also elevates it with the aromatic richness of vanilla bean, creating a harmonious blend that delights the senses.
Pears, with their juicy texture and nuanced flavor profiles, provide the perfect foundation for this tart, while vanilla bean adds an exquisite touch that transforms the ordinary into the extraordinary. This recipe is particularly appealing during the fall and winter months when pears are at their peak, inviting warmth and comfort to any gathering. Whether you are preparing for a festive occasion or simply indulging in a sweet treat after dinner, the Delicate Pear & Vanilla Bean Bliss Tart is sure to impress.
The Perfect Crust: Foundation of a Great Tart
A well-crafted tart crust is the cornerstone of a successful tart, contributing not just to its overall structure but also to its flavor and texture. The perfect crust should be buttery, flaky, and provide a subtle contrast to the luscious filling that lies within. Let’s break down the essential ingredients that come together to create this delightful base.
– All-purpose flour: This is the primary building block of the crust, providing the necessary structure. Its protein content allows for a sturdy yet tender texture, crucial for holding the tart’s filling.
– Unsalted butter: This ingredient is key to achieving a rich flavor. Using unsalted butter gives you control over the salt content, allowing the natural sweetness of the other ingredients to shine through.
– Powdered sugar: Unlike granulated sugar, powdered sugar contributes to a delicate sweetness that complements the buttery flavor of the crust without overwhelming it.
– Egg yolk and vanilla extract: Both of these ingredients enhance the richness of the crust while adding an additional layer of flavor. The egg yolk helps bind the ingredients, resulting in a cohesive and smooth dough.
– Salt: A pinch of salt is essential for balancing the sweetness and enhancing the overall taste of the crust.
Step-by-Step Guide to Making the Crust
1. Creaming Butter and Sugar: Begin by placing the unsalted butter and powdered sugar in a mixing bowl. Using an electric mixer, beat them together on medium speed until the mixture is light and fluffy. This process incorporates air, which is crucial for a tender crust.
2. Mixing Ingredients: Gradually add the all-purpose flour and salt to the creamed butter and sugar. Mix on low speed until just combined, being careful not to overwork the dough. Next, add the egg yolk and vanilla extract, mixing until the dough comes together.
3. Shaping the Dough: Once the dough is well combined, transfer it onto a lightly floured surface. Gently knead the dough a few times to bring it together, then shape it into a disc. This helps to prevent the dough from cracking later on.
4. Chilling the Dough: Wrap the disc of dough in plastic wrap and refrigerate it for at least 30 minutes. Chilling the dough is essential as it allows the butter to firm up, which helps achieve that desired flaky texture when baked.
Preparing the Tart Pan: A Key Step for Success
Once the dough has chilled, it’s time to prepare the tart pan. This step is critical to ensure that your tart bakes evenly and releases easily from the pan.
– Preheat the Oven: Start by preheating your oven to 350°F (175°C). This ensures that the crust will start baking immediately when placed in the oven, promoting an even rise.
– Rolling Out the Dough: On a lightly floured surface, roll out the chilled dough into a circle about 1/8 inch thick. Take care to maintain an even thickness to avoid uneven baking. If the dough becomes too soft, return it to the refrigerator for a few minutes to firm up.
– Fitting the Dough into the Pan: Carefully transfer the rolled-out dough to the tart pan. Gently press the dough into the corners and sides of the pan, ensuring that it fits snugly. Trim any excess dough hanging over the edges with a sharp knife.
– Using Parchment Paper and Pie Weights: To prevent the crust from bubbling up during baking, line the crust with parchment paper and fill it with pie weights or dried beans. This technique helps to maintain the shape of the crust and ensures a flat surface for the custard filling.
– Baking the Crust: Place the tart pan in the preheated oven and bake for about 15-20 minutes or until the edges are golden brown. Keep an eye on the crust, as visual cues can vary based on your oven and the thickness of the dough. A perfectly baked crust will have a light golden hue, indicating it’s ready for the filling.
Creating the Custard Filling: A Luxurious Blend
While the crust is baking, it’s the perfect time to prepare the custard filling. This luxurious blend of flavors not only complements the pear but also elevates the entire tart experience.
The custard filling is a delicate mixture that brings together the richness of cream and eggs with the fragrant notes of vanilla bean. Here’s a closer look at the essential ingredients that will make this filling truly divine:
– Heavy cream: The base of the custard filling, heavy cream provides a rich and creamy texture that enhances the overall mouthfeel of the tart.
– Granulated sugar: This sweetener balances the flavors, ensuring that the custard is not too rich but rather harmonizes beautifully with the sweetness of the pears.
– Eggs: Eggs are the binding agents in the custard, providing structure and creaminess. They also contribute to the tart’s overall richness.
– Vanilla bean: The star of the filling, vanilla bean adds an intense and aromatic flavor profile that beautifully complements the pears. The tiny seeds from the bean not only enhance the visual appeal of the tart but also infuse it with a complex, sweet scent.
– Pears: The final ingredient is, of course, the pears. Choose ripe, juicy pears for the best flavor. When baked, they will soften and become even sweeter, creating a delightful contrast with the creamy custard.
With these initial steps completed, you are well on your way to creating a stunning Delicate Pear & Vanilla Bean Bliss Tart. The next phase will focus on assembling the tart and baking it to perfection, ensuring that every bite is a taste of bliss. Stay tuned for the remaining steps, where we will bring this elegant dessert to life.

Ripe Pears: Choosing the Best Variety for Flavor and Texture
When it comes to making the perfect Delicate Pear & Vanilla Bean Bliss Tart, selecting the right pears is crucial. You want a variety that offers both sweetness and a firm texture to hold up during baking. For this recipe, Bartlett, Bosc, or Anjou pears are excellent choices. Bartlett pears are incredibly juicy and sweet, while Bosc pears have a firmer texture and a hint of spice. Anjou pears are versatile, offering a balance of sweetness and texture that works beautifully in tarts. Choose ripe pears that yield slightly to pressure but are not overly soft. This ensures they maintain their shape and flavor throughout the baking process.
Heavy Cream and Whole Milk: The Balance of Creaminess and Richness
The custard filling of your tart hinges on the right balance between heavy cream and whole milk. Heavy cream brings richness and a luxurious mouthfeel, while whole milk adds a slight lightness and helps to balance the overall texture. For this recipe, use one cup of heavy cream and one cup of whole milk. This combination creates a custard that is creamy without being overly dense. The creaminess of the custard will beautifully complement the delicate sweetness of the pears, making every bite a delightful experience.
Granulated Sugar: Sweetening the Custard
To sweeten the custard, granulated sugar is the ideal choice. It dissolves easily and helps to enhance the natural sweetness of the pears. For this recipe, you will need three-quarters of a cup of granulated sugar. This amount strikes a perfect balance, ensuring that the tart is not overly sweet, allowing the flavors of the pears and vanilla to shine. Remember, you can always adjust the sugar based on the ripeness of your pears and personal preference.
Eggs: Binding and Thickening the Custard
Eggs play a vital role in the custard filling by acting as a binding agent and thickening the mixture. You will need four large eggs for this recipe. The proteins in the eggs coagulate during baking, creating a custard that is both smooth and stable. Make sure to whisk the eggs well before incorporating them into the mixture; this will help create a uniform texture and prevent any lumps in your final custard.
Vanilla Bean vs. Vanilla Extract: Discussing the Flavor Depth
When it comes to achieving a rich, aromatic flavor in your tart, the choice between vanilla bean and vanilla extract is significant. While vanilla extract is convenient, using fresh vanilla beans enhances the overall flavor profile of the custard. The tiny seeds from the vanilla bean provide an aromatic depth that is unmatched. For this recipe, use one whole vanilla bean. Split the bean lengthwise with a sharp knife and scrape out the seeds. Both the seeds and the pod should be added to the cream mixture to extract maximum flavor.
Cornstarch: Its Role in Achieving the Right Consistency
Cornstarch is a crucial ingredient in this tart as it helps to stabilize the custard and achieve the perfect consistency. By thickening the mixture, cornstarch ensures that the custard sets properly without becoming too runny. For this recipe, use two tablespoons of cornstarch. Make sure to mix it with a little bit of sugar before adding it to the egg mixture to prevent clumping. This step is essential for a smooth and velvety custard.
Step-by-Step Instructions for Making the Custard
Now, let’s dive into the step-by-step instructions for creating the custard filling for your bliss tart.
Heating the Cream Mixture Without Boiling
1. In a medium saucepan, combine one cup of heavy cream, one cup of whole milk, and the scraped seeds from the vanilla bean along with the pod.
2. Heat the mixture over medium heat, stirring occasionally until it is hot but not boiling. You want to see gentle steam rising from the surface.
Combining the Egg Mixture Smoothly to Avoid Curdling
3. In a separate bowl, whisk together the four large eggs, three-quarters of a cup of granulated sugar, and two tablespoons of cornstarch until smooth.
4. Once the cream mixture is hot, remove it from the heat and slowly pour a small amount into the egg mixture while whisking continuously. This process is known as tempering and prevents the eggs from scrambling.
5. Gradually add the remaining cream mixture to the eggs, whisking until fully combined.
Assembling the Tart: Artful Presentation Matters
The assembly of your tart is a key moment, as presentation can elevate its appeal.
Tips for Arranging Pear Slices Attractively on the Crust
1. Start by peeling, halving, and coring your ripe pears. Slice them thinly to allow for an attractive arrangement.
2. Begin by layering the slices in a circular pattern, starting from the outer edge of the tart shell and working your way toward the center. Overlap the slices slightly for a visually appealing design.
Pouring the Custard Filling: Techniques to Ensure Even Distribution
3. Once your pear slices are arranged, carefully pour the custard mixture over the pears. To ensure even distribution, you can gently tap the tart on the counter to help the custard settle into the spaces between the slices.
Baking the Tart: Timing for Perfection
The baking process is crucial for achieving a perfect custard texture.
Importance of Baking at the Right Temperature for Custard Setting
1. Preheat your oven to 350°F (175°C).
2. Bake the tart for 40-45 minutes, or until the custard is set but still slightly jiggly in the center. The edges should appear firm and golden brown.
Indicators for Doneness: How to Check if the Custard is Set
3. To check for doneness, gently shake the tart; if the center quivers slightly, it’s ready to come out of the oven. Avoid overbaking, as this can lead to a rubbery texture.
Cooling and Refrigerating: Why Patience is Essential for the Best Results
4. Once baked, allow the tart to cool in the pan for about 15 minutes before transferring it to a wire rack to cool completely. After cooling, refrigerate the tart for at least two hours before serving. This chilling time is essential for the custard to fully set and for the flavors to meld beautifully.
Serving Suggestions: Elevating Your Tart Experience
Presentation is key when serving your Delicate Pear & Vanilla Bean Bliss Tart.
Ideas for Garnishing the Tart
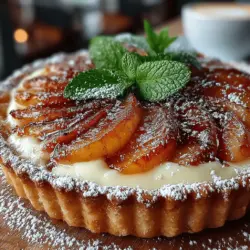
1. Just before serving, dust the top of the tart with a light sprinkle of powdered sugar to add an elegant touch.
2. For a pop of color and freshness, add a few fresh mint leaves. They not only enhance the visual appeal but also provide a refreshing contrast to the sweetness of the tart.
Ideal Pairings: What Beverages Complement This Tart Beautifully
3. Pair your tart with a glass of dessert wine, such as a late harvest Riesling or a Moscato. The sweetness of these wines complements the flavors of the tart beautifully. Alternatively, serve it with a rich cup of coffee or a delicate herbal tea for a balanced dessert experience.
Conclusion
The Delicate Pear & Vanilla Bean Bliss Tart is truly a delightful dessert that strikes a perfect balance between elegance and simplicity. The combination of sweet, ripe pears with the rich, velvety custard creates a memorable treat perfect for any occasion. Whether you are celebrating a special event or simply indulging yourself, this tart is sure to impress.
With its artful presentation and harmonious flavors, this tart is not just a dessert; it’s an experience. We encourage you to give it a try, whether for a family gathering, a dinner party, or just a sweet treat for yourself. There is unmatched joy in baking and sharing homemade desserts, and this tart is an excellent way to showcase your culinary skills. Enjoy the process and the delightful results!