Oreo Delight Ice Cream: A Homemade Treat for All Seasons
As the warm weather rolls in, there’s nothing quite like the refreshing sensation of homemade ice cream. It’s a delightful way to cool off, and the process of creating this frozen treat from scratch can be immensely rewarding. Whether it’s a family gathering, a summer barbecue, or simply a quiet evening at home, serving up a bowl of ice cream can elevate any occasion. Among the myriad of flavors and combinations available, Oreo Delight Ice Cream stands out as a crowd-pleaser. This creamy, dreamy concoction marries the beloved taste of Oreos with the smooth texture of homemade ice cream, making it an irresistible dessert option.
The Oreo cookie, an iconic treat since its inception in 1912, has held a special place in the hearts of cookie lovers around the world. With its signature dark chocolate wafer and sweet cream filling, Oreos have proven to be more than just a snack; they’ve become a versatile ingredient that enhances a wide range of desserts. From cakes to milkshakes, the addition of Oreos can transform simple recipes into indulgent delights. In this article, we will explore how to create Oreo Delight Ice Cream, a recipe that is not only easy to make but also delivers a rich and satisfying flavor that will have everyone asking for seconds.
Understanding the Basics of Ice Cream Making
Before diving into the specifics of making Oreo Delight Ice Cream, it’s essential to understand the fundamentals of ice cream making. The key to crafting a creamy and delicious ice cream lies in the quality of the ingredients and the techniques employed during the process.
The Role of Heavy Whipping Cream
At the core of any great ice cream recipe is heavy whipping cream. This ingredient plays a crucial role in achieving that rich and creamy texture that we all crave. Heavy whipping cream has a high-fat content—typically around 36%—which contributes to the ice cream’s overall creaminess. When frozen, the fat in heavy whipping cream helps create a smooth mouthfeel, preventing large ice crystals from forming.
Using heavy whipping cream instead of regular milk or lighter creams is essential for achieving the right balance of richness and texture. The higher fat content not only enhances the creaminess but also aids in the overall stability of the ice cream, ensuring it maintains its shape even after being stored in the freezer.
Sweetened Condensed Milk: A Sweet Addition
Another crucial ingredient in Oreo Delight Ice Cream is sweetened condensed milk. This thick, syrupy milk is made by removing most of the water content from regular milk and then adding sugar. The result is a sweetened, creamy product that is perfect for desserts.
Sweetened condensed milk serves multiple purposes in ice cream making: it adds sweetness, richness, and a velvety texture. Unlike regular milk or cream, it doesn’t require additional sugar, making it an efficient option for enhancing the flavor profile of the ice cream. Its unique properties also help to prevent ice crystals from forming, contributing to a smoother final product.
Vanilla Extract: A Flavor Enhancer
While Oreos provide a delightful chocolatey flavor, vanilla extract is essential in rounding out the taste of the ice cream. Vanilla is often referred to as the universal flavor because it pairs well with so many other ingredients, and it complements the chocolatey richness of Oreos perfectly.
Incorporating pure vanilla extract into the ice cream mixture enhances the overall flavor complexity, providing a subtle warmth that balances the sweetness of both the Oreos and the condensed milk.
The Magic of Whipping Techniques
Whipping cream is a vital step in the ice cream-making process. Achieving stiff peaks while whipping is essential for incorporating air into the mixture, which contributes to the light and airy texture of the final product.
To whip cream properly, start with cold heavy whipping cream and use either a stand mixer or a hand whisk. Begin at a low speed to break the cream down, gradually increasing to medium-high speed. Watch closely as you whip—the cream should thicken and eventually form soft peaks, which will transform into stiff peaks as you continue. Be cautious not to over-whip, as this can lead to a grainy texture and even cause the cream to turn into butter.
The Star Ingredient: Oreo Cookies
No discussion of Oreo Delight Ice Cream would be complete without a closer look at the Oreo cookie itself. With a rich history that spans over a century, Oreos have become a staple in American culture and beyond. Originally created as a simple chocolate wafer cookie, the Oreo has evolved into a beloved snack that comes in various flavors, forms, and even seasonal editions.
History and Popularity of Oreos
First introduced by the Nabisco company in 1912, Oreos quickly gained popularity for their unique combination of flavors and textures. Over the decades, they have become the best-selling cookie in the United States, with a loyal fan base that spans generations. The versatility of Oreos has led to a plethora of creative uses in the culinary world, making them a go-to ingredient for bakers and dessert enthusiasts alike.
Today, Oreos are available in numerous flavors—from classic Original to Double Stuf, Golden, and even limited-edition varieties like Pumpkin Spice and Red Velvet. This vast array of options allows for endless creativity in the kitchen, making Oreos a fun ingredient to experiment with in desserts.
Crushed vs. Whole Oreos in Recipes
When it comes to incorporating Oreos into desserts, the choice between using crushed Oreos and whole Oreos can significantly impact the texture and presentation of the dish.
Crushed Oreos are often used to create a uniform flavor throughout the dessert. They blend seamlessly into ice cream, adding a delightful crunch while maintaining a smooth texture. On the other hand, using whole Oreos can provide a more rustic presentation, showcasing the iconic cookie itself. Whole Oreos can also create interesting textural contrasts, adding both creaminess and crunch to each bite.
Step-by-Step Guide to Making Oreo Delight Ice Cream
Now that we’ve explored the essential ingredients and techniques involved in ice cream making, let’s dive into the step-by-step process of creating your own Oreo Delight Ice Cream. This recipe is straightforward, making it accessible for both novice and experienced home cooks.
Whipping the Cream
Begin by pouring cold heavy whipping cream into a mixing bowl. If you want to ensure maximum fluffiness, chill your mixing bowl and beaters in the freezer for about 10 minutes before starting.
Using a stand mixer or electric hand mixer, start whipping the cream on low speed, gradually increasing to medium-high. As the cream begins to thicken, keep an eye on it; you’re aiming for stiff peaks. When you can lift the whisk out of the cream and it stands upright without drooping, you’ve achieved the perfect whipped cream.
Avoid the common mistake of over-whipping, which can turn your cream grainy. If this happens, you may have to start over, so patience is key during this step.
Combining Ingredients
Once your cream is whipped to perfection, it’s time to combine it with the other key ingredients: sweetened condensed milk, vanilla extract, and, of course, crushed Oreos.
In a separate large bowl, combine the sweetened condensed milk and vanilla extract. Gently fold the whipped cream into this mixture using a spatula, working carefully to maintain the airy texture of the whipped cream. Once combined, fold in the crushed Oreos, ensuring they are evenly distributed throughout the mixture.
This is where the fun begins! You can customize the amount of crushed Oreos based on your preference. For a more intense Oreo flavor, add more cookies; for a more subtle taste, you can reduce the quantity.
Now that you have your Oreo mixture ready, the next steps will involve freezing and serving your delightful creation. Stay tuned for the continuation of this recipe, where we will cover these final steps and provide tips for enjoying your homemade Oreo Delight Ice Cream.
Creating your own ice cream at home is a delightful way to indulge in a cool treat, especially when it comes to the luscious Oreo Delight Ice Cream. This recipe, featuring the iconic Oreo cookie, is not only simple to prepare but also allows for personalization and creativity. In this section, we will explore the critical steps in ensuring your ice cream turns out perfectly, including mixing techniques, freezing tips, serving suggestions, and creative variations to try.
The Importance of Gently Mixing Whipped Cream with Condensed Milk
One of the key steps in making Oreo Delight Ice Cream is combining the whipped cream with sweetened condensed milk. This mixture serves as the base for your ice cream, and the technique you use can significantly impact the final texture.
When you whip the cream, you incorporate air into it, which is essential for achieving a light and fluffy ice cream. Therefore, it is crucial to mix the whipped cream with the condensed milk gently. Over-mixing can deflate the whipped cream and lead to a denser final product. Use a spatula for this step, and employ a folding motion rather than vigorous stirring. This method retains the airiness of the whipped cream, ensuring your ice cream is creamy and fluffy rather than heavy and dense.
Tips for Maintaining the Airiness of the Whipped Mixture
1. Chill Your Equipment: Before whipping the cream, ensure that your mixing bowl and beaters are cold. This helps the cream whip up more efficiently and maintain its volume.
2. Use Heavy Whipping Cream: Opt for heavy cream with at least 36% fat content. This type of cream whips up better and provides a richer texture.
3. Add Flavor with Care: If you’re incorporating any extracts or flavorings, do so in moderation to avoid compromising the whipped cream’s structure.
4. Fold Gently: Always fold the whipped cream into the condensed milk in small batches. This allows for better integration without losing the airiness.
Folding in the Oreo Crumbs
Once your whipped cream and condensed milk are beautifully blended, it’s time to fold in those crunchy Oreo crumbs. Folding is a technique that helps maintain the structure of the mixture, which is particularly important in ice cream making.
The Technique of Folding
To fold the Oreo crumbs into the whipped mixture:
1. Spoon in the Crumbs: Add a portion of the Oreo crumbs to the whipped cream mixture.
2. Use a Spatula: Slide the spatula down the side of the bowl, across the bottom, and then lift the mixture back over the top. Rotate the bowl a quarter turn and repeat.
3. Be Gentle: Continue this process until the Oreo crumbs are evenly distributed, but be careful not to over-mix.
Folding is crucial because it prevents the whipped cream from collapsing, which can happen if you stir too aggressively. The result will be a creamy, airy ice cream studded with delightful bits of Oreo.
Creative Variations
Feel free to experiment with your Oreo Delight Ice Cream by adding unique mix-ins. Here are some ideas to jumpstart your creativity:
– Nut Butters: Swirl in some peanut butter or almond butter for a nutty flavor.
– Fruits: Add fresh strawberries or raspberries for a fruity contrast to the chocolatey Oreos.
– Chocolate Swirls: Drizzle in some chocolate syrup before freezing for an extra touch of sweetness.
Freezing and Serving the Ice Cream
After mixing in the Oreo crumbs, it’s time to transfer the mixture to a suitable container for freezing. Proper freezing techniques are essential to achieve that perfect scoopable texture.
How to Properly Freeze the Ice Cream
1. Choose the Right Container: Use an airtight container for freezing. A loaf pan works well, but ensure it has a lid or tightly sealed plastic wrap to prevent ice crystals from forming.
2. Spread Evenly: Pour the ice cream mixture into the container and spread it evenly. Smooth the top with a spatula.
3. Cover Well: Place a piece of plastic wrap directly on the surface of the ice cream before sealing the container. This helps prevent freezer burn.
4. Freeze Time: Allow the ice cream to freeze for at least 4-6 hours or overnight for the best results. The longer it freezes, the firmer it will become.
Serving Suggestions and Presentation Ideas
When you’re ready to serve your homemade Oreo Delight Ice Cream, presentation can elevate the experience. Here are some delightful serving ideas:
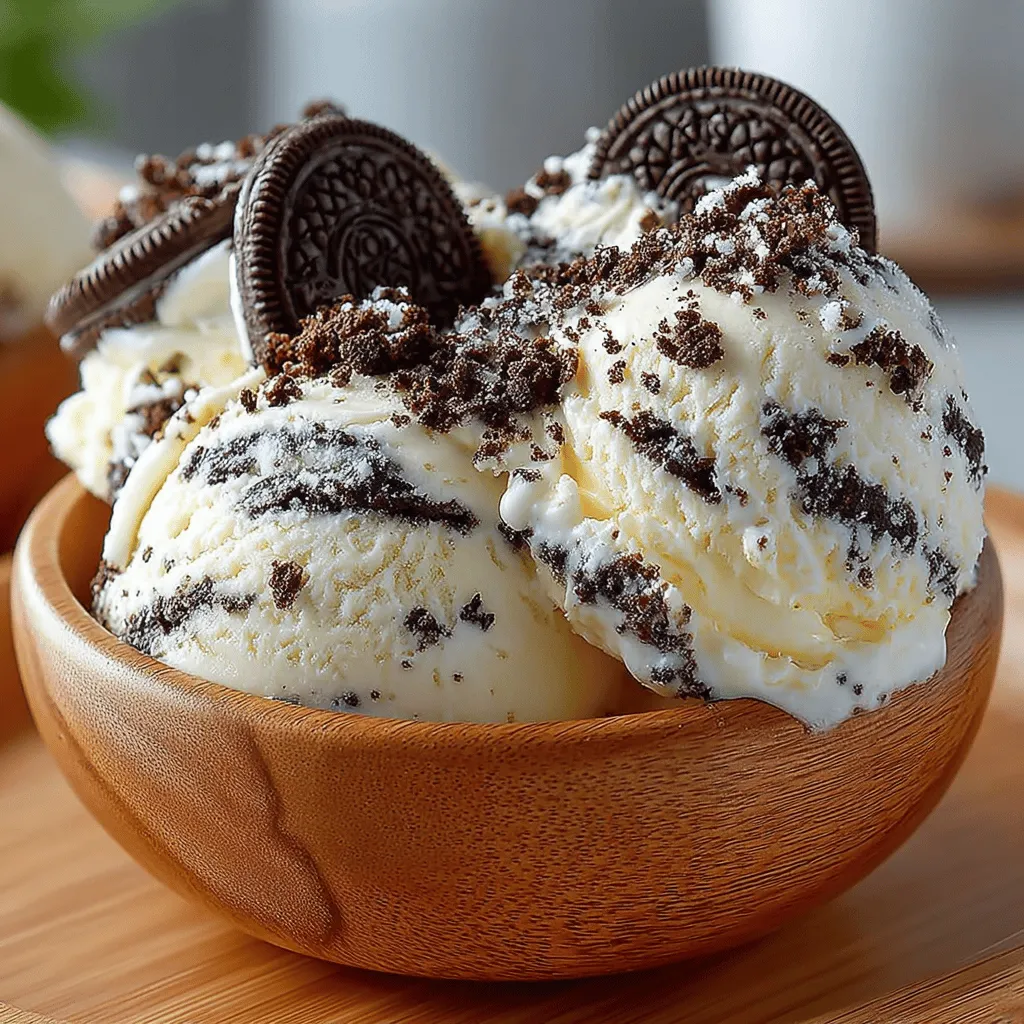
– Scoop into Bowls: Serve generous scoops in colorful bowls, allowing guests to see the chunky Oreo pieces.
– Garnish: Top with whipped cream, additional crushed Oreos, or a drizzle of chocolate sauce for added flair.
– Ice Cream Sundae: Create an ice cream sundae by layering the Oreo ice cream with chocolate sauce, sprinkles, and cherries.
– Ice Cream Sandwiches: Use the ice cream to make sandwich cookies by placing scoops between two chocolate cookies or even more Oreos.
Creative Variations on Oreo Delight Ice Cream
The beauty of making your own ice cream lies in the freedom to explore different flavors and textures. Here are some creative variations to consider when making your Oreo Delight Ice Cream:
Different Cookie Options
If you’re looking for alternatives to Oreos due to dietary restrictions or personal preferences, consider these options:
– Gluten-Free Cookies: Use gluten-free sandwich cookies to make a similar treat without gluten.
– Mint Oreos: For a refreshing twist, substitute regular Oreos with mint-flavored Oreos.
– Peanut Butter Cookies: Use peanut butter sandwich cookies for a nutty and rich flavor profile.
Mix-Ins and Flavor Enhancements
Incorporating additional mix-ins can add exciting flavors and textures to your ice cream:
– Chocolate Chips: Stir in mini chocolate chips or chunks for an extra chocolatey experience.
– Nuts: Add chopped nuts like walnuts or pecans for a crunchy contrast.
– Candy Bars: Incorporate pieces of your favorite candy bars for a sweet surprise in every bite.
– Flavor Enhancements: Consider adding a teaspoon of instant coffee or espresso powder for a mocha flavor, or swirl in caramel sauce for a delightful contrast.
Healthier Alternatives for Oreo Delight Ice Cream
If you’re looking to enjoy this delicious treat with a healthier twist, consider the following modifications:
Substituting Ingredients
1. Low-Fat Cream: Use low-fat or reduced-fat cream to cut down on calories while still maintaining a creamy texture.
2. Plant-Based Milks: Substitute condensed milk with a plant-based milk alternative, like coconut milk or almond milk, combined with a natural sweetener.
3. Reducing Sugar Content: Try using stevia or monk fruit sweetener instead of sugar in the condensed milk. Be mindful of the ratios, as these sweeteners can be sweeter than sugar.
The Benefits of Homemade Ice Cream
Making your own ice cream offers numerous benefits over store-bought varieties, enhancing the overall experience.
Quality Control and Ingredient Transparency
By creating ice cream at home, you have complete control over the ingredients. You can avoid preservatives, artificial flavors, and high fructose corn syrup often found in commercial ice cream. You can also select high-quality ingredients, ensuring that every scoop is as delicious as possible.
Customization and Creativity
Homemade ice cream invites you to unleash your creativity. You can experiment with flavors, choose your mix-ins, and adjust sweetness levels to suit your taste. This personalization allows you to create a treat that’s uniquely yours, tailored to your preferences.
Conclusion
Making Oreo Delight Ice Cream at home is a joyful experience that combines simplicity with creativity. This recipe not only celebrates the beloved Oreo cookie but also invites you to explore the endless possibilities of ice cream-making. The process of crafting this delightful treat can bring family and friends together, creating lasting memories during hot summer days.
As you scoop into your homemade Oreo Delight Ice Cream, take a moment to appreciate the deliciousness that comes from your kitchen. Whether you choose to stick to the classic recipe or venture into innovative variations, each batch will be an expression of your culinary creativity and a celebration of togetherness. So, gather your loved ones and embark on this sweet adventure—your taste buds will thank you!