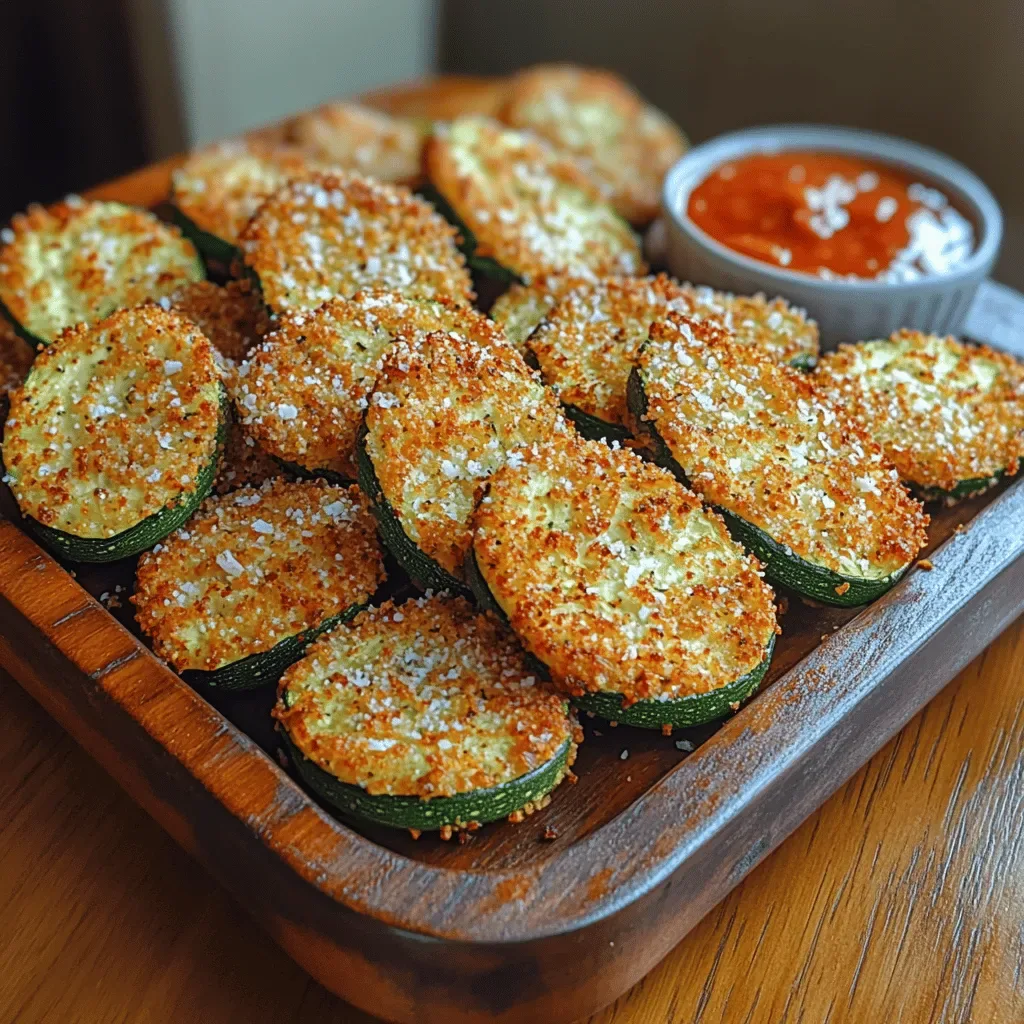
Crispy Air Fryer Zucchini Fries: A Deliciously Healthy Snack
 Save
Save
Imagine biting into a golden‑crisp fry that’s light, veggie‑packed, and guilt‑free—welcome to Crispy Air Fryer Zucchini Fries, the snack that turns a humble summer squash into a brunch star. The secret lies in a light, seasoned coating that becomes perfectly crunchy in the hot‑air whirl of an air fryer, while the interior stays tender and bright.
What makes this recipe stand out is the balance of texture and flavor: a subtle Parmesan‑herb crust, a dash of smoked paprika for depth, and a drizzle of tangy yogurt dip that adds creaminess without the extra calories of traditional dips.
Kids, busy professionals, and anyone craving a healthier alternative to potato fries will love these bites. Serve them at a leisurely weekend brunch, as a side to eggs benedict, or as a snack while the coffee brews.
The process is straightforward—slice, coat, air‑fry, and dip. In just under half an hour you’ll have a snack that’s crisp on the outside, moist inside, and packed with nutrients.
Why You'll Love This Recipe
Low‑Calorie Crunch: Zucchini delivers volume and moisture with far fewer calories than potatoes, letting you indulge without the guilt.
Speedy Prep: With just a few minutes of slicing and a quick coating, you can have a hot snack ready in under 20 minutes.
Air Fryer Friendly: The hot‑air circulation creates a uniform crispness, eliminating the need for excess oil and keeping the fries light.
Versatile Pairings: Pair with a cool yogurt dip, a spicy sriracha mayo, or enjoy them plain—each option adds a new flavor dimension.
Tips & Tricks
Perfecting the Recipe
Dry the Zucchini Thoroughly. Moisture is the enemy of crispness; after cutting, lay sticks on paper towels and press gently to remove excess water.
Use Whole‑Wheat Panko. The larger flakes create a lighter, airier crunch compared to fine breadcrumbs.
Spray Lightly, Not Heavily. A fine mist of oil gives color without making the fries greasy.
Shake the Basket Mid‑Cook. This redistributes the fries, ensuring both sides receive equal heat.
Flavor Enhancements
Add a pinch of grated lemon zest to the breadcrumb mix for a bright citrus note, or stir in ½ teaspoon of crushed red‑pepper flakes for a subtle heat. Finish the hot fries with a sprinkle of extra Parmesan for an extra umami boost.
Common Mistakes to Avoid
Do not skip the egg wash; without it the breadcrumbs will slide off during cooking. Also, avoid using a low air‑fryer temperature—400°F is essential for a true crunch. Finally, resist the urge to stack fries; crowding creates steam, resulting in soggy fries.
Pro Tips
Pre‑Season the Zucchini. Lightly toss the sticks with a pinch of salt 10 minutes before coating; this draws out excess moisture and intensifies flavor.
Use a Thermometer for Oil Spray. A quick mist at room temperature prevents the coating from becoming soggy.
Serve Immediately. The fries are at their crispiest within 5 minutes of exiting the air fryer; a quick plate keeps the texture intact.
Make the Dip Ahead. Chill the yogurt sauce for at least 15 minutes; this thickens it and enhances the lemon‑dill flavor.
Variations
Ingredient Swaps
Swap zucchini for yellow squash or even thick carrot sticks for a sweeter profile. For a dairy‑free version, replace Parmesan with nutritional yeast and use a coconut‑based yogurt for the dip. If you prefer a gluten‑free crust, use almond flour mixed with gluten‑free breadcrumbs.
Dietary Adjustments
To keep the snack keto‑friendly, omit the yogurt dip or substitute it with a full‑fat sour cream mixed with herbs. For vegans, use a flax‑egg (1 tbsp ground flaxseed + 3 tbsp water) instead of chicken eggs and choose plant‑based cheese alternatives.
Serving Suggestions
Serve these fries alongside a sunny‑side‑up egg for a brunch plate, or pair with avocado toast for a balanced morning meal. They also work as a side to a hearty bowl of tomato soup or a crisp mixed green salad drizzled with vinaigrette.
Storage Info
Leftover Storage
Allow the fries to cool completely, then transfer them to an airtight container lined with a paper towel to absorb any residual moisture. Store in the refrigerator for up to 3 days. For longer preservation, freeze in a single layer on a baking sheet, then move to a freezer‑safe bag; they’ll keep for 2 months.
Reheating Instructions
Re‑crisp the fries by placing them back in the air fryer at 375°F for 4–5 minutes, or bake on a preheated 400°F sheet for 6 minutes. Avoid the microwave, which makes the coating soggy. Warm the yogurt dip gently in a saucepan or enjoy it cold for contrast.
Frequently Asked Questions
Can I make these fries ahead of time?
What if I don’t have an air fryer?
How do I keep the fries from getting soggy?
This air‑fried zucchini fry recipe delivers the satisfying crunch of a classic snack while staying light, nutritious, and quick enough for any brunch rush. By following the detailed steps, storage tips, and variations, you’ll master a versatile dish that can be tailored to any diet or flavor craving. Feel free to experiment with herbs, spices, or dipping sauces—making it truly your own. Enjoy the golden bites and the proud smiles around the table!
Crispy Air Fryer Zucchini Fries: A Deliciously Healthy Snack
Delicious Crispy Air Fryer Zucchini Fries: A Deliciously Healthy Snack
Ingredients
Main Ingredients
- 2 large zucchini (about 1 lb)
- 2 large eggs
- 2 tablespoons olive oil (for spray)
Breading
- ½ cup whole‑wheat panko breadcrumbs
- ¼ cup grated Parmesan cheese
- 1 teaspoon smoked paprika
- ½ teaspoon garlic powder
- ¼ teaspoon salt
- ¼ teaspoon freshly ground black pepper
Dipping Sauce
- ¾ cup plain Greek yogurt
- 1 tablespoon fresh lemon juice
- 1 teaspoon chopped fresh dill
- ¼ teaspoon sea salt
Instructions
Coating the Sticks
- Dip in Egg. Place a handful of zucchini sticks into the egg wash, turning to coat every surface. The egg acts as a glue, helping the breadcrumb mixture cling during air‑frying.
- Roll in Breading. Transfer the egg‑coated sticks to the breadcrumb bowl. Toss gently until each piece is fully covered. Press lightly to ensure the coating sticks, especially on the ends.
- Arrange in Air Fryer Basket. Lightly spray the basket with olive oil, then lay the coated sticks in a single layer. Overcrowding traps steam and prevents browning; work in batches if necessary.
- Air Fry. Set the air fryer to 400°F (200°C) and cook for 8 minutes. At the halfway mark, open the drawer, shake gently, and spray the tops with a quick mist of olive oil. This ensures both sides become golden and crunchy.
- Check for Doneness. After 8 minutes, the fries should be deep golden and crisp. If any pieces need extra color, add an additional 1–2 minutes. They will continue to firm up as they rest.
Similar Recipes
 Appetizers
Zesty Air Fryer Zucchini Pizza Bites: A Healthy Snack Option
Delicious Zesty Air Fryer Zucchini Pizza Bites: A Healthy Snack Option
 Appetizers
Air Fryer Meatball Sliders: 5 Reasons You’ll Love Them
Learn how to make delicious Air Fryer Meatball Sliders: 5 Reasons You’ll Love Them. Easy recipe…
 Appetizers
creamy sweet potato casserole with maple pecan streusel for festive dinners
Indulge in our creamy sweet potato casserole with maple pecan streusel, perfect for festive dinners. Get…
 Appetizers
Crunchy Air Fryer Zucchini Spears
Delicious Crunchy Air Fryer Zucchini Spears
 Appetizers
baked brie with fig jam and almonds for elegant holiday entertaining
Learn how to make delicious baked brie with fig jam and almonds for elegant holiday entertaining.…
 Appetizers
spring menu design: 5 Inspiring Ways to Celebrate Spring
Learn how to make delicious spring menu design: 5 Inspiring Ways to Celebrate Spring. Easy recipe…
 Appetizers
Irresistible Garlic Bread Rolls: A Comforting Delight
Delicious Irresistible Garlic Bread Rolls: A Comforting Delight
 Appetizers
Mini Chicken Caesar Biscuit Sliders
Delicious Mini Chicken Caesar Biscuit Sliders

Susan
I cook these recipes at home before they ever land here — simple ingredients, clear steps.