Cheddar and Bacon Turkey Melt on Sourdough
 Save
Save
There’s a particular kind of magic that happens in my kitchen when the first bite of a perfectly toasted sandwich lands on my tongue. I still remember the first time I crafted this Cheddar and Bacon Turkey Melt on Sourdough for a chilly autumn afternoon; the kitchen was filled with the crackle of bacon, the sharp tang of cheddar, and the comforting scent of fresh sourdough that seemed to wrap the whole house in a warm hug. The moment you lift the lid of the skillet, a cloud of fragrant steam hits you, carrying hints of smoked paprika and a whisper of garlic that makes your mouth water before the first bite even arrives. This isn’t just another sandwich – it’s a celebration of textures, flavors, and that nostalgic feeling of gathering around a table with people you love, sharing something that feels both indulgent and home‑cooked.
What makes this melt truly special is the marriage of three stars: the tangy, buttery crunch of sourdough, the rich, melt‑in‑your‑mouth cheddar, and the smoky, salty crunch of bacon, all hugging tender slices of turkey that have been seasoned just right. Imagine the cheese bubbling and turning a beautiful golden hue, the bacon crackling as it releases its caramelized fat, and the turkey soaking up a subtle mustard‑mayonnaise glaze that keeps every bite juicy. The result is a sandwich that sings with every chew, a perfect balance of salty, savory, and just a hint of sweetness from the toasted bread. But wait—there’s a secret trick in step 4 that will take this melt from delicious to unforgettable, and I’ll reveal it shortly.
Beyond the flavor fireworks, this recipe is a testament to the beauty of simplicity done right. You don’t need a fancy kitchen gadget or a pantry full of exotic spices; just a handful of everyday ingredients, a good skillet, and a little patience. The process is straightforward enough for a weekday lunch, yet impressive enough to wow guests at a weekend brunch. And because it’s built on sturdy, wholesome components, you can tweak it to suit any dietary preference or flavor craving without losing its soul‑satisfying core.
Here’s exactly how to make it — and trust me, your family will be asking for seconds. Follow each step, soak in the aromas, and watch as your kitchen transforms into a little slice of comfort‑food heaven. Ready? Let’s dive in and create a melt that will become a new family favorite.
🌟 Why This Recipe Works
- Flavor Depth: The combination of sharp cheddar, smoky bacon, and seasoned turkey creates layers of taste that build with each bite, ensuring the sandwich never feels one‑dimensional.
- Texture Contrast: Crispy bacon, gooey cheese, and the hearty chew of sourdough provide a satisfying mouthfeel that keeps you reaching for another bite.
- Ease of Execution: With only a few steps and minimal prep, even a busy weekday can accommodate this melt without sacrificing quality.
- Time Efficiency: In under an hour you go from raw ingredients to a golden, bubbling masterpiece, making it perfect for quick lunches or relaxed dinners.
- Versatility: Swap turkey for chicken, use a different cheese, or add greens—this base adapts to whatever you have on hand.
- Nutrition Balance: Protein‑rich turkey and bacon paired with calcium‑dense cheddar give you a satisfying, energy‑boosting meal.
- Ingredient Quality: Using good sourdough and fresh, sharp cheddar elevates the sandwich from ordinary to restaurant‑worthy.
- Crowd‑Pleasing Factor: The familiar flavors of bacon and cheese make this melt a hit with kids and adults alike, ensuring it disappears quickly.
🥗 Ingredients Breakdown
The Foundation: Sourdough & Butter
Sourdough isn’t just a vehicle for the fillings; its natural tang and airy crumb create a sturdy yet tender base that can hold up to the weight of cheese and bacon without falling apart. When you choose a loaf with a thick crust and a soft interior, you get that perfect bite‑to‑crunch ratio that makes each mouthful exciting. If you can, pick a locally baked sourdough that’s still a little warm from the oven—its residual steam helps the butter melt evenly. Butter adds richness and helps the bread achieve that coveted golden‑brown finish; using softened butter ensures an even spread, preventing any dry patches.
Protein Power: Turkey & Bacon
Cooked turkey, whether rotisserie‑style or leftover from a holiday feast, brings lean protein and a subtle, savory backdrop that lets the other flavors shine. Shredding or thinly slicing the turkey ensures it melds seamlessly with the cheese, creating a cohesive melt rather than clumps of meat. Bacon is the star of the show when it comes to texture and smoky depth; crisp it until the fat renders fully, then pat it on paper towels to keep the sandwich from becoming greasy. If you’re looking for a healthier twist, try turkey bacon, but remember the flavor won’t be as intense.
The Secret Weapons: Cheddar, Mustard & Mayo
Sharp cheddar is the melting hero, offering a buttery melt that turns into a glossy, stretchy blanket over the turkey and bacon. Its natural sharpness cuts through the richness of the bacon, creating a harmonious balance. The mustard adds a tangy zip that lifts the overall flavor profile, while the mayonnaise contributes a silky mouthfeel that keeps the sandwich from drying out. Together they form a creamy spread that adheres to the bread and infuses the turkey with a subtle zing.
Finishing Touches: Aromatics & Greens
A pinch of garlic powder and smoked paprika adds depth without overwhelming the sandwich, while a dash of salt and freshly cracked black pepper seasons the whole ensemble. If you love a little peppery bite, toss in a handful of fresh arugula or spinach just before serving; the greens add a pop of color and a fresh contrast to the rich, melty interior. For those who enjoy a little heat, a thin slice of jalapeño can be slipped in, but keep it modest so the main flavors stay front and center.
With your ingredients prepped and ready, let's get cooking. Here’s where the fun really begins…
🍳 Step-by-Step Instructions
🔐 Expert Tips for Perfect Results
The Taste Test Trick
Before you assemble the final sandwich, take a moment to taste the mayo‑mustard spread on a scrap piece of bread. Adjust the seasoning with a pinch more salt or a dash of honey if you crave a subtle sweetness. Trust me on this one: a perfectly balanced spread makes the whole melt sing.
Why Resting Time Matters More Than You Think
Allowing the assembled melt to rest for a couple of minutes after cooking isn’t just about convenience; it lets the cheese fibers re‑align, giving you that satisfying stretch when you pull it apart. I once skipped this step and ended up with cheese spilling everywhere—lesson learned!
The Seasoning Secret Pros Won’t Tell You
Adding a pinch of smoked paprika to the butter before you toast the bread introduces a subtle smoky undertone that complements the bacon beautifully. It’s a tiny detail, but it elevates the flavor profile from ordinary to restaurant‑level.
Butter vs. Oil: The Golden Debate
While butter gives you that classic buttery crust, a light drizzle of olive oil can boost the crispiness without adding extra dairy richness. If you’re watching your saturated fat, go for the oil, but remember that butter is what gives that signature flavor most people love.
The Crunch Factor: Bacon Placement
Place the bacon in the middle of the sandwich rather than on the top layer. This protects the bacon from the direct heat of the skillet, preserving its crispness while still allowing its rendered fat to seep into the turkey and cheese. I once layered it on top and it turned soggy within seconds—don’t make that mistake.
🌈 Delicious Variations to Try
One of my favorite things about this recipe is how versatile it is. Here are some twists I've tried and loved:
The Southwest Spin
Swap the sharp cheddar for pepper jack, add sliced avocado, and sprinkle a handful of cilantro after cooking. The result is a creamy, slightly spicy melt that feels like a fiesta in every bite.
Italian Inspiration
Use provolone cheese, replace the mustard with a thin layer of pesto, and add sun‑dried tomatoes. The aromatic basil and tangy tomato notes turn the sandwich into a Mediterranean delight.
Breakfast Boost
Introduce a fried egg on top of the turkey before adding the cheese, and finish with a drizzle of hot sauce. The runny yolk creates a luxurious sauce that melds the flavors together, making it a perfect brunch option.
Veggie‑Lover’s Dream
Omit the bacon and add roasted red peppers, caramelized onions, and a slice of mozzarella. This version keeps the melt hearty while catering to vegetarians who still crave that cheesy goodness.
Spicy Chipotle Kick
Mix a teaspoon of chipotle in adobo sauce into the mayo‑mustard spread, and add a few thin slices of pickled jalapeño. The smoky heat pairs beautifully with the cheddar and bacon, giving the sandwich a bold personality.
Herb‑Infused Delight
Stir fresh thyme and rosemary into the butter before toasting the bread. The fragrant herbs infuse the crust with an earthy aroma that complements the turkey’s mild flavor.
📦 Storage & Reheating Tips
Refrigerator Storage
Allow the melt to cool completely before wrapping it tightly in parchment paper followed by aluminum foil. Store it in the refrigerator for up to 2 days. When you’re ready to eat, reheat gently to retain the crisp crust.
Freezing Instructions
Wrap each sandwich individually in plastic wrap, then place them in a freezer‑safe bag. They’ll keep for up to 1 month. To reheat, thaw overnight in the fridge, then toast in a skillet or oven until the cheese melts and the bread regains its crunch.
Reheating Methods
The trick to reheating without drying it out? A splash of water in the pan and a quick cover with a lid for 2‑3 minutes, followed by a brief uncover to restore the crust’s crunch. In a toaster oven, set to 350°F and heat for about 8 minutes, checking that the cheese is fully melted.
❓ Frequently Asked Questions
Can I use a different type of bread?
What if I don’t have sharp cheddar?
Can I make this melt ahead of time for a party?
Is it okay to use pre‑cooked turkey?
How can I make this recipe gluten‑free?
What’s the best way to keep the bacon crispy?
Can I add a sauce on top?
Is it okay to use turkey bacon instead of regular bacon?
Serve the sandwich immediately while it’s still steaming, pairing it with a simple side salad or a handful of crisp pickle spears. The contrast of the warm, gooey interior with a cool, tangy side makes each bite feel balanced. If you have any leftovers, they can be revived later—just a quick flash in the skillet will bring back that original crunch.
Similar Recipes
 Dinner
Sweet & Spicy Honey Garlic Shrimp Recipe
Delicious Sweet & Spicy Honey Garlic Shrimp Recipe
 Dinner
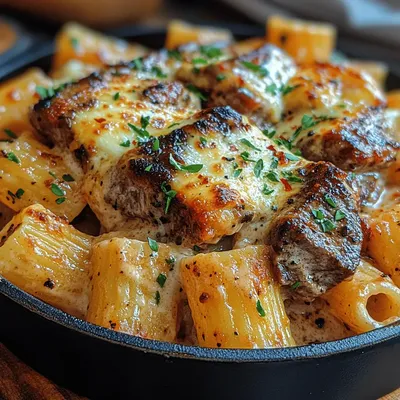
Sizzling Garlic Butter Steak Tips with Cheesy Rigatoni: A Comfort Food Delight
Delicious Sizzling Garlic Butter Steak Tips with Cheesy Rigatoni: A Comfort Food Delight
 Dinner
Crispy Grilled Fish Tostadas: A Flavorful Delight
Delicious Crispy Grilled Fish Tostadas: A Flavorful Delight
 Dinner
Colorful Veggie-Packed Pasta Primavera Skillet
Delicious Colorful Veggie-Packed Pasta Primavera Skillet
 Dinner
One-Pot Chickpea and Spinach Coconut Curry: A Flavorful and Nutritious Delight
Delicious One-Pot Chickpea and Spinach Coconut Curry: A Flavorful and Nutritious Delight
 Dinner
Meal Prep Chicken And Broccoli Alfredo For A Comfort Lunch
Learn how to make delicious Meal Prep Chicken And Broccoli Alfredo For A Comfort Lunch. Easy…
 Dinner
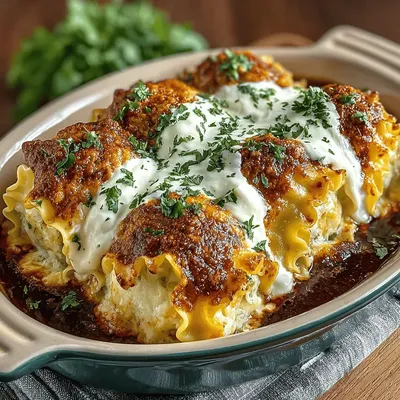
Hatch Chili Chicken Pasta Rolls: The Ultimate Comfort Food
Delicious Hatch Chili Chicken Pasta Rolls: The Ultimate Comfort Food
 Dinner
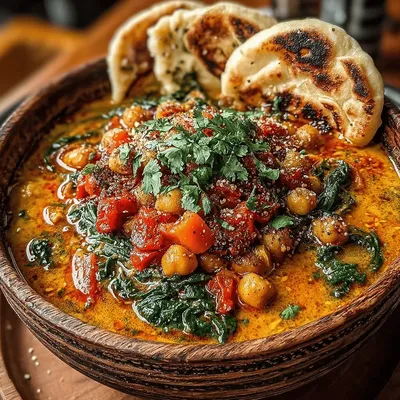
Slow-Cooked Creamy Coconut Chickpea Curry
Delicious Slow-Cooked Creamy Coconut Chickpea Curry

Susan
I cook these recipes at home before they ever land here — simple ingredients, clear steps.