Indulging in the rich, creamy delight of cheesecake is a treat that many of us cherish. The velvety texture and sweet flavor of traditional cheesecake alone can make for an exquisite dessert experience. However, when you combine that with the crunchy, salty goodness of pretzels and the irresistible taste of peanut butter, you create a dessert that transcends the ordinary. The Peanut Butter Cup Pretzel Cheesecake Bars bring together these wonderful flavors into a luscious treat that is perfect for any occasion. Whether you are hosting a party, celebrating a special event, or simply treating yourself, these bars are sure to impress.
In this article, we will explore the step-by-step process of creating these decadent bars, the ingredients that make them special, and why they deserve a spot in your dessert repertoire. From their unique flavor combinations to the delightful textures, Peanut Butter Cup Pretzel Cheesecake Bars are not just a dessert; they are an experience worth savoring.
Understanding the Flavors of Peanut Butter Cup Pretzel Cheesecake Bars
To truly appreciate the Peanut Butter Cup Pretzel Cheesecake Bars, it’s essential to understand the unique flavor profile they offer. This dessert is a harmonious blend of various tastes and textures that come together to create a sensational treat.
The Delightful Contrast Between Sweet and Salty
One of the standout features of these bars is the delightful contrast between sweet and salty. The salty crunch of the pretzel crust serves as the perfect counterpoint to the creamy, sweet cheesecake filling. Each bite offers a burst of flavor that tantalizes the taste buds. The richness of the peanut butter adds another layer of complexity, enhancing the overall taste experience. Whether you’re a fan of sweet desserts, salty snacks, or a combination of both, these cheesecake bars provide a satisfying balance that keeps you coming back for more.
The Role of Texture in Creating a Memorable Dessert Experience
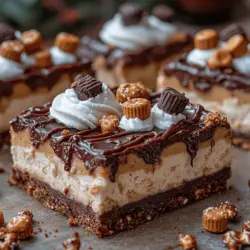
In addition to the flavor profile, the texture of Peanut Butter Cup Pretzel Cheesecake Bars plays a crucial role in their appeal. The crunchy pretzel crust provides a sturdy foundation that contrasts beautifully with the smooth, creamy cheesecake filling. Topped with a silky chocolate ganache and pieces of peanut butter cups, these bars offer a delightful combination of textures that enhance each bite. The crunchy, chewy, and creamy elements work together to create a dynamic dessert that is as enjoyable to eat as it is to savor.
Ingredients Breakdown
Understanding the ingredients that make up Peanut Butter Cup Pretzel Cheesecake Bars can help you appreciate their unique qualities and prepare them with confidence. Each component contributes to the overall flavor and texture, ensuring that these bars are a standout dessert.
The Pretzel Crust: A Crunchy Foundation
The foundation of these cheesecake bars is the pretzel crust, which is made from crushed pretzels mixed with melted butter and a touch of sugar. This combination creates a crunchy base that not only adds a delightful saltiness but also provides a sturdy structure to hold the cheesecake filling. The pretzels’ unique flavor enhances the overall taste of the bars, making them more complex and satisfying.
The Cheesecake Filling: Creamy, Rich, and Decadent
At the heart of these bars lies the creamy cheesecake filling, made with cream cheese, sugar, peanut butter, and eggs. This filling is rich and decadent, offering a luxurious mouthfeel that contrasts perfectly with the crunchy crust. The addition of peanut butter not only intensifies the flavor but also adds an extra layer of creaminess to the filling. This combination of ingredients creates a cheesecake that is irresistibly smooth and flavorful, making each bite a delightful indulgence.
The Topping: Chocolate Ganache and Peanut Butter Cups for a Finishing Touch
To elevate the Peanut Butter Cup Pretzel Cheesecake Bars even further, they are topped with a luscious chocolate ganache and chopped peanut butter cups. The ganache, made from heavy cream and chocolate, adds a silky richness that complements the creamy cheesecake filling. Meanwhile, the pieces of peanut butter cups provide a fun and tasty crunch, enhancing the overall experience. This topping not only adds visual appeal but also contributes to the dessert’s decadent flavor profile, making it a truly indulgent treat.
Step-by-Step Instructions
Creating Peanut Butter Cup Pretzel Cheesecake Bars may seem daunting, but with a clear and detailed guide, you can master this recipe with ease. Below are the initial steps involved in preparing these delicious bars, ensuring that you have everything you need to get started.
Preparing the Baking Dish and Preheating the Oven
1. Gather Your Ingredients: Before you begin, ensure you have all the ingredients for the crust, filling, and topping ready at hand. This will streamline the process and make it easier to follow the steps.
2. Preheat Your Oven: Preheat your oven to 350°F (175°C). This step is crucial, as a properly preheated oven will help your crust bake evenly and achieve the right texture.
3. Prepare the Baking Dish: Line an 8-inch square baking dish with parchment paper, leaving some overhang on the sides. This will make it easier to lift the bars out of the dish once they are set. If you prefer a more traditional approach, you can also grease the dish with cooking spray or butter.
4. Make the Pretzel Crust: In a large mixing bowl, combine 2 cups of crushed pretzels with ½ cup of melted butter and ¼ cup of sugar. Mix until the pretzels are fully coated with the butter and sugar mixture. The texture should resemble wet sand.
5. Press the Crust into the Dish: Pour the pretzel mixture into the prepared baking dish and press it down firmly with the back of a measuring cup or your hands. Aim for an even layer that covers the bottom of the dish. This step is vital for ensuring that the crust holds its shape during baking.
6. Bake the Crust: Place the baking dish in the preheated oven and bake for approximately 10 minutes, or until the crust is lightly golden. Keep an eye on it to prevent over-baking, as a slightly undercooked crust will maintain its crunchiness after the bars are assembled.
With the crust prepared and baking in the oven, you are well on your way to creating your Peanut Butter Cup Pretzel Cheesecake Bars. The next steps will guide you through making the creamy filling and assembling the bars for baking. Stay tuned for the continuation of this delicious journey into the world of cheesecake perfection.
{{image_1}}
Crafting the Pretzel Crust: Techniques for Achieving the Perfect Base
Creating the ideal pretzel crust for your Peanut Butter Cup Pretzel Cheesecake Bars is an essential step that sets the foundation for this delightful treat. Here are some techniques to ensure your crust is both crunchy and flavorful.
1. Choosing the Right Pretzels: Start by selecting high-quality pretzels. Traditional pretzel twists work well, but you may also consider pretzel sticks for a different texture. The goal is to create a crust that has a great crunch and a hint of saltiness to complement the sweet cheesecake filling.
2. Crushing the Pretzels: Use a food processor to crush the pretzels into fine crumbs, but be cautious not to turn them into powder. Aim for a coarse texture that retains some small pieces; this will give your crust added crunch. If you don’t have a food processor, you can place the pretzels in a zip-top bag and crush them with a rolling pin.
3. Mixing the Ingredients: Combine the crushed pretzels with melted butter and a touch of sugar. The butter acts as a binding agent, while sugar enhances the sweetness. Use about 1/2 cup of crushed pretzels, 1/4 cup of melted butter, and 2 tablespoons of sugar. Mix until the crumbs are evenly coated.
4. Pressing the Crust: Transfer the mixture into a greased baking dish and firmly press it into an even layer. Use the back of a measuring cup or your hands to create a compact crust, ensuring it adheres well to the bottom. This step is crucial as a well-pressed base will hold together better during baking and slicing.
5. Pre-baking: Bake the pretzel crust at 350°F (175°C) for about 8-10 minutes. This pre-baking process helps to set the crust and enhances its flavor, creating a base that is both crunchy and deliciously aromatic.
Making the Cheesecake Filling: Tips for a Smooth and Creamy Texture
The cheesecake filling is the star of the show, and achieving a smooth, creamy texture is vital. Here’s how to make it perfectly.
1. Room Temperature Ingredients: Ensure your cream cheese is at room temperature before mixing. This step is essential for preventing lumps in your filling. You can leave the cream cheese out for about an hour before you start or microwave it for 10-15 seconds to soften it slightly.
2. Proper Mixing Technique: In a large mixing bowl, beat the softened cream cheese with a hand mixer or stand mixer on medium speed until it’s smooth and creamy. This usually takes about 2-3 minutes. Scrape down the sides of the bowl frequently to ensure all ingredients are well incorporated.
3. Incorporating Sugar and Eggs: Gradually add in granulated sugar and mix until fully combined. Follow this by adding eggs one at a time, mixing just until incorporated. Overmixing can introduce too much air, which may lead to cracks in your cheesecake.
4. Adding Flavor: Incorporate creamy peanut butter and vanilla extract into the mixture. For a richer flavor, use a high-quality peanut butter without added sugars or stabilizers. Mix until the filling is silky smooth.
5. Final Touches: If desired, fold in mini chocolate chips or chunks for added texture and flavor within the cheesecake.
Layering the Cheesecake and Baking: Ensuring Even Cooking for the Perfect Consistency
Layering your cheesecake filling over the pretzel crust and baking it properly is essential for achieving the right consistency.
1. Layering: Pour the cheesecake filling over the pre-baked pretzel crust, using a spatula to spread it evenly. Ensure that the filling reaches the edges of the crust for an even layer.
2. Baking: Bake the cheesecake at 325°F (160°C) for about 30-35 minutes. The center should be set but slightly jiggly when you remove it from the oven. Overbaking can lead to a dry texture, so keep an eye on it.
3. Cooling Gradually: After baking, turn off the oven and crack the oven door open, allowing the cheesecake to cool slowly. This gradual cooling helps prevent cracks. Leave it in the oven for an additional 30 minutes before removing it to cool completely at room temperature.
Creating the Chocolate Ganache: Achieving the Ideal Pourable Texture
The chocolate ganache is the finishing touch that elevates your cheesecake bars to a whole new level. Here’s how to achieve the perfect pourable texture.
1. Choosing the Chocolate: Use high-quality semi-sweet or dark chocolate for a rich flavor. Chop the chocolate into small pieces to ensure it melts evenly.
2. Heating the Cream: In a small saucepan over medium heat, bring heavy cream to a simmer. Once it starts to bubble around the edges, remove it from heat.
3. Combining: Pour the hot cream over the chopped chocolate, allowing it to sit for a minute. This resting period allows the chocolate to soften before you stir.
4. Stirring: Whisk the mixture until it’s completely smooth and glossy. If you find any lumps remain, you can return the mixture to gentle heat, stirring until fully melted.
5. Cooling Slightly: Allow the ganache to cool for a few minutes before pouring it over the cooled cheesecake. This will ensure that it doesn’t melt the filling beneath it.
Cooling and Assembling the Dessert: Importance of Chilling for Flavor Development
Once the ganache is poured, proper chilling is key to developing the flavors and achieving the right texture.
1. Chill the Cheesecake Bars: After pouring the ganache over the cheesecake, place it in the refrigerator for at least 4 hours, or preferably overnight. This chilling time allows the flavors to meld together beautifully and ensures the bars are set for easy slicing.
2. Slicing Technique: When ready to serve, use a sharp knife dipped in warm water to slice the bars cleanly. Wipe the knife after each cut to maintain neat edges.
Serving and Presentation
Presentation is key when serving your Peanut Butter Cup Pretzel Cheesecake Bars. Here are some ideas to make your dessert shine:
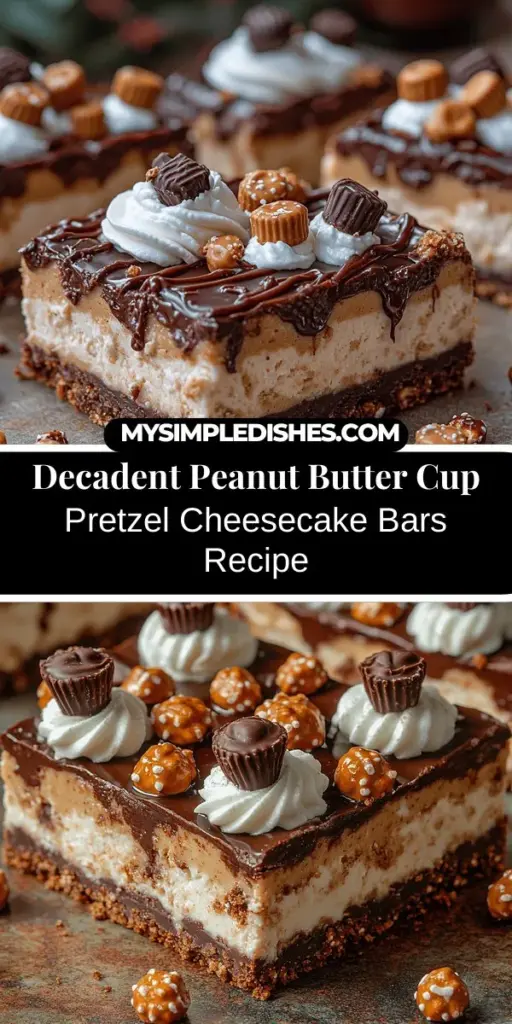
1. Garnishing Options: Top each bar with a dollop of whipped cream for an airy contrast to the dense cheesecake. You can also sprinkle additional mini peanut butter cups or crushed pretzels on top for added texture and visual appeal.
2. Perfect Pairings: Consider serving these cheesecake bars with a hot cup of coffee or a glass of cold milk. A rich chocolate stout or a sweet dessert wine can also enhance the flavors of the bars, providing a delightful pairing that elevates the overall experience.
Nutritional Insights
Understanding the nutritional content of your Peanut Butter Cup Pretzel Cheesecake Bars can help you make informed choices without sacrificing flavor.
1. Breaking Down the Nutritional Content: Each serving contains a balance of carbohydrates, proteins, fats, and sugars, thanks to the combination of cream cheese, peanut butter, and pretzels. The specific values can vary based on the exact ingredients used, but on average, each bar may contain around 350-400 calories.
2. Understanding the Caloric Value and Key Ingredients: The bars are primarily made up of cream cheese and peanut butter, which add richness and protein. The pretzel crust contributes carbohydrates and a bit of fiber. Keep in mind that while these bars are indulgent, they also provide energy and can be enjoyed in moderation.
3. Dietary Substitutions for Health-Conscious Readers: For those looking to make healthier choices, consider using reduced-fat cream cheese or Greek yogurt for the filling. You can also substitute almond flour for the pretzel crust to create a gluten-free version. Additionally, using sugar alternatives like stevia or monk fruit sweetener can reduce the overall sugar content.
Conclusion
Peanut Butter Cup Pretzel Cheesecake Bars are more than just a dessert; they are an experience that combines the best of sweet, salty, and creamy elements into a delightful treat. By following the steps outlined in this article, you can create a batch that is sure to impress family and friends alike. Embrace the joy of baking and savor the delicious results of your culinary efforts with this irresistible recipe. With every bite, you’ll understand why these bars are a crowd favorite, perfect for any occasion or simply as a well-deserved indulgence.