Spooky Halloween Spider Cookies: A Deliciously Fun Recipe
As the leaves turn vibrant shades of orange and gold and the air becomes crisp, the Halloween season invites an atmosphere of excitement and creativity. This time of year is not only about costumes and decorations; it is also synonymous with themed treats that add a dash of whimsy to gatherings and celebrations. From spooky cupcakes to ghostly cakes, festive baking is a cherished tradition, and what better way to embrace the Halloween spirit than with a batch of Spooky Halloween Spider Cookies?
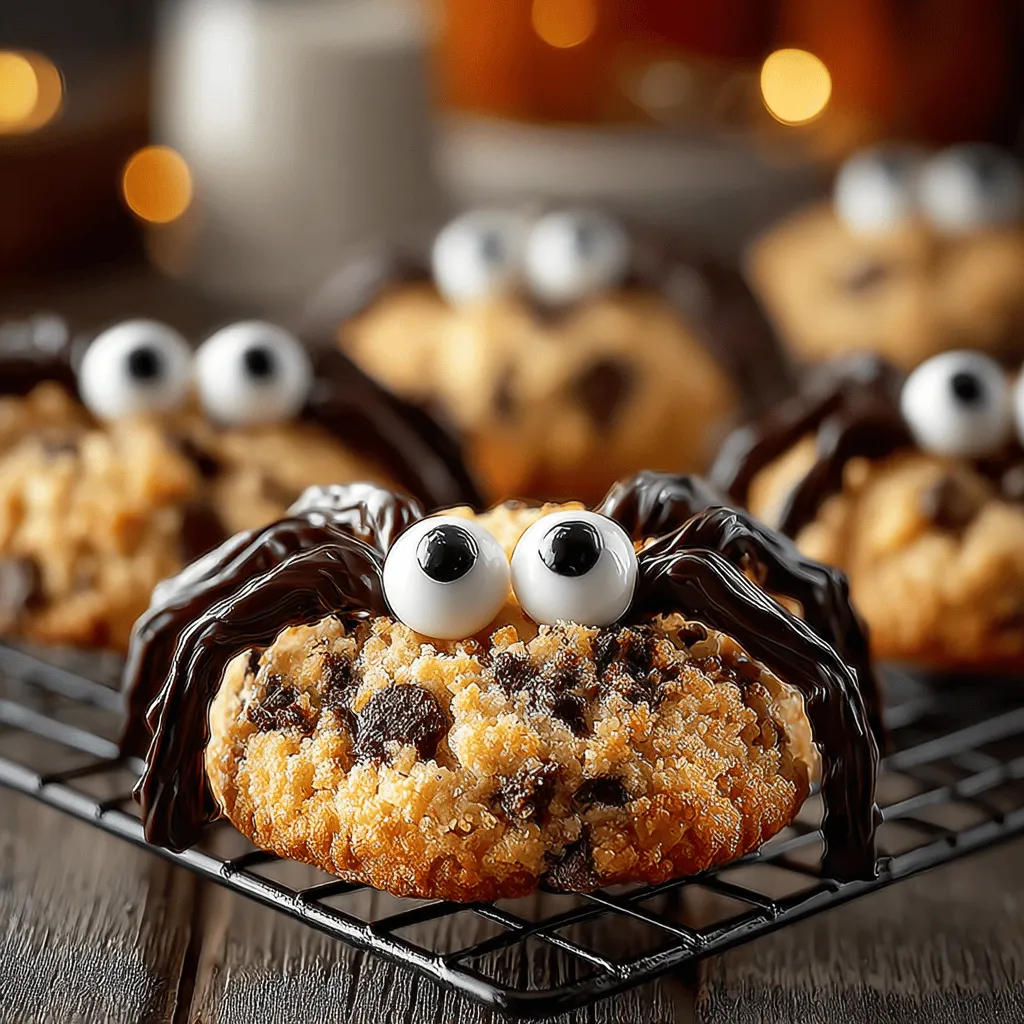
These delightful cookies are more than just a tasty treat; they are a fun project that the whole family can enjoy. Shaped like little spiders and decorated with candy eyes and licorice legs, these cookies are sure to captivate the imaginations of children and adults alike. The Spooky Halloween Spider Cookies combine the joy of baking with the thrill of the holiday, making them the perfect addition to any Halloween party or gathering.
The Allure of Halloween Treats
Halloween is a time when creativity runs wild, especially in the kitchen. Themed treats allow bakers to unleash their imagination, transforming ordinary ingredients into festive delights. Spooky cookies, creepy cakes, and ghoulish candies are not just about taste; they also play a significant role in enhancing the overall ambiance of Halloween celebrations. Visually appealing treats can evoke laughter and conversation, creating lasting memories among family and friends.
Baking these themed recipes together can also foster stronger connections. Whether it’s a family gathering or a friendly get-together, the act of creating festive goodies brings people closer. Laughter fills the air as cookie dough is rolled out, and excitement builds while decorating takes place. The process of making Spooky Halloween Spider Cookies can serve as a delightful bonding experience, making it more than just a culinary endeavor.
Ingredients for Spooky Halloween Spider Cookies
To create these enchanting Spider Cookies, you’ll need a selection of common baking ingredients, each playing a crucial role in achieving the perfect cookie texture and flavor. Here’s a breakdown of what you’ll need:
– Unsalted Butter: The cornerstone of any cookie recipe, unsalted butter contributes to the rich flavor and tender texture of the cookies. Using unsalted butter allows for better control over the overall saltiness of the final product.
– Granulated and Brown Sugars: A combination of granulated and brown sugars adds complexity to the cookies. Granulated sugar provides sweetness and contributes to a crispy edge, while brown sugar introduces moisture and chewiness, resulting in a delightful contrast.
– Eggs: Eggs are essential for binding the ingredients together and adding moisture to the dough. They also help create a light and airy texture when baked.
– Vanilla Extract: A splash of vanilla extract enhances the flavor profile of the cookies, adding a warm and inviting note that complements the sweetness.
– All-Purpose Flour: The backbone of the cookie dough, all-purpose flour gives structure to the cookies. The right amount of flour ensures that the cookies maintain their shape while baking.
– Baking Soda and Salt: Baking soda acts as a leavening agent, helping the cookies rise slightly and achieve a soft, chewy texture. A pinch of salt balances the sweetness and enhances the overall flavor.
– Chocolate Chips: Chocolate chips add a delightful burst of chocolatey goodness to each bite. They melt slightly during baking, creating a gooey center that enhances the cookie experience.
– Black Licorice: This unique ingredient serves a special purpose in the recipe. Cut into strips, black licorice is used to create the spider legs, adding an authentic Halloween touch to the cookies.
– Edible Candy Eyes: The final decorative touch, edible candy eyes, brings the spiders to life. These fun and whimsical decorations add a playful element that is sure to delight everyone.
Step-by-Step Instructions for Making Spider Cookies
Now that you have gathered all the ingredients, it’s time to dive into the baking process! Here’s a simple guide to help you create your own Spooky Halloween Spider Cookies.
1. Preheat the Oven: Start by preheating your oven to 350°F (175°C). This step ensures that the cookies bake evenly and achieve that perfect golden color.
2. Cream the Butter and Sugars: In a large mixing bowl, cream together the unsalted butter, granulated sugar, and brown sugar until the mixture is light and fluffy. This process usually takes about 2-3 minutes with an electric mixer. The fluffiness is crucial as it incorporates air into the dough, contributing to the cookies’ texture.
3. Add the Eggs and Vanilla: Beat in the eggs, one at a time, followed by the vanilla extract. Ensure that each egg is fully incorporated before adding the next. This step not only adds moisture but also helps to create a cohesive dough.
4. Combine the Dry Ingredients: In a separate bowl, whisk together the all-purpose flour, baking soda, and salt. This ensures that the leavening agent and salt are evenly distributed throughout the flour, which is essential for consistent baking.
5. Mix Dry Ingredients with Wet: Gradually add the dry ingredient mixture to the wet ingredients, mixing until just combined. Be careful not to overmix, as this can lead to tough cookies.
6. Fold in the Chocolate Chips: Gently fold in the chocolate chips, ensuring they are evenly distributed throughout the dough. The chocolate chips will provide a delightful contrast to the Halloween-themed elements.
7. Shape the Cookies: Using a cookie scoop or two tablespoons, drop rounded balls of dough onto a baking sheet lined with parchment paper, leaving space between each cookie to allow for spreading during baking.
8. Bake the Cookies: Place the baking sheet in the preheated oven and bake for 10-12 minutes, or until the edges are lightly golden. The centers may look slightly underbaked, but they’ll firm up as they cool.
9. Add the Spider Legs and Eyes: While the cookies are still warm, insert the black licorice strips into the sides of each cookie to create spider legs. Add two edible candy eyes on top of each cookie, slightly pressing them into the dough to ensure they stick.
With these initial steps, you’re well on your way to creating a batch of Spooky Halloween Spider Cookies that will surely be the highlight of any Halloween gathering. The combination of fun shapes and delicious flavors will make these treats a hit with everyone, creating a memorable experience to share with family and friends.
Preheat the Oven
Before diving into the mixing and baking process, it’s crucial to preheat your oven to the correct temperature, typically set to 350°F (175°C) for cookies. Proper temperature control ensures that your Spider Cookies bake evenly, achieving a delightful combination of a chewy center and slightly crisp edges. An oven that is too hot can cause your cookies to spread too quickly, leading to flat, undesirable results. Conversely, an oven that is not heated adequately may result in undercooked cookies. Always allow your oven ample time to reach the desired temperature before placing your cookies inside.
Creaming the Butters and Sugars
The creaming process is a vital step in cookie preparation as it affects the final texture of your cookies significantly. Begin by combining softened butter (or a combination of butter and shortening) with both granulated and brown sugars in a large mixing bowl. Using an electric mixer, beat the mixture on medium speed until it becomes light and fluffy, usually about 3-5 minutes. This process incorporates air into the dough, which contributes to a softer texture and helps achieve a nice rise during baking. The brown sugar adds moisture and a hint of caramel flavor, while the granulated sugar contributes to the cookie’s crispness.
Adding Eggs and Vanilla
Once your butter and sugar mixture is fluffy, it’s time to add the eggs and vanilla extract. Crack in the eggs, one at a time, and mix on low speed until fully incorporated. Adding eggs not only helps bind the ingredients together but also adds moisture to the dough, resulting in a richer flavor. The vanilla extract enhances the overall taste profile of your cookies, creating a more aromatic treat. Ensure that you mix well but avoid overmixing, as this can lead to dense cookies.
Combining Dry Ingredients
In a separate bowl, sift together your dry ingredients, which typically include all-purpose flour, baking soda, and salt. Sifting is an important step that helps to aerate the flour, removing any lumps and ensuring an even distribution of the leavening agent (baking soda) within the mixture. This process affects the structure and consistency of your cookies, promoting a uniform rise as they bake. Baking soda acts as a leavening agent, creating air pockets that give your cookies a light texture, while salt enhances the overall flavor.
Mixing Dry and Wet Ingredients
With your dry ingredients ready, it’s time to combine them with the wet ingredients. Gradually add the dry mixture to the creamed butter, sugar, and egg mixture. Use a spatula or wooden spoon to mix until the dough just comes together. It’s essential to avoid overmixing at this stage; excessive stirring can develop the gluten in the flour, resulting in tougher cookies. You want the dough to be slightly sticky but manageable. If it feels too wet, you can add a little extra flour, one tablespoon at a time, until you reach the desired consistency.
Folding in Chocolate Chips
Now comes the fun part! Gently fold in chocolate chips, ensuring they are evenly distributed throughout the dough. This step is critical for achieving optimal flavor in each bite of your Spider Cookies. You can use semi-sweet chocolate chips for a classic taste or mix in some white chocolate chips for a striking contrast against the dark dough. For an extra spooky twist, consider using orange or purple chocolate chips, which can enhance the Halloween theme.
Forming the Cookies
When it comes to shaping your cookies, using a cookie scoop or two spoons can help you achieve uniform sizes, ensuring even baking. Scoop about 1.5 tablespoons of dough and roll it into a ball before placing it on a parchment-lined baking sheet. Leave adequate space between each cookie, as they will spread during baking. For a fun spider effect, you can slightly flatten the balls with the palm of your hand, allowing them to maintain a round shape while also giving them a bit of character.
Baking Process
Bake your cookies in the preheated oven for approximately 10-12 minutes. Keep an eye on them during the last few minutes of baking. The cookies are done when the edges are set, and the centers appear slightly underbaked – they will continue to cook as they cool on the baking sheet. For optimal doneness, allow the cookies to cool on the baking sheet for 5 minutes before transferring them to a wire rack. This cooling period helps set the cookies and prevents them from breaking apart.
Creating the Spider Effects
To transform your cookies into spooky spider treats, the decorating process can be both fun and creative. After your cookies have cooled completely, melt some chocolate or black icing and place it in a piping bag or a ziplock bag with a corner snipped off. Pipe a small circle in the center of the cookie for the spider’s body and then create four legs on each side. You can use mini chocolate candies, like M&Ms or chocolate-covered almonds, as the spider’s body. Add edible eyes (available at most craft stores) for an extra touch of fright! Feel free to get imaginative with your designs – the more creative, the better!
Cooling the Cookies
Cooling your cookies is essential for achieving the desired texture. Allow the cookies to cool on a wire rack for at least 30 minutes. This cooling period helps the cookies firm up, making them easier to handle and enhancing their flavors as they settle. Warm cookies can be delicious, but they may fall apart if not cooled adequately before serving or decorating.
The Fun and Festive Presentation
When it comes to Halloween, presentation is key. Consider placing your Spooky Halloween Spider Cookies on a decorative platter or a themed cookie stand to showcase your hard work. Here are a few creative ideas for decorating and serving your cookies:
– Spider Web Display: Use black lace or a spider-web tablecloth as a backdrop for your cookie presentation. This enhances the spooky aesthetic and draws attention to your treats.
– Variety of Designs: Experiment with different types of candy for the spiders. Use gummy worms for a creepy effect, or create colorful spiders using candies in various shades. Each cookie can have its unique design for added fun!
– Party Favors: Consider packaging individual cookies in clear bags tied with black or orange ribbons for Halloween party favors. This not only adds a personal touch but also makes for a sweet treat for guests to take home.
Nutritional Information and Serving Suggestions
While indulging in delicious treats like Spider Cookies, understanding the nutritional aspects can be beneficial. Each cookie typically contains about 150 calories, with a balanced mix of carbohydrates, fats, and sugars. To make your cookies a bit healthier, you can substitute some of the all-purpose flour with whole wheat flour or use less sugar overall without compromising the taste.
Pair your Spider Cookies with Halloween-themed beverages for a complete festive experience. Consider serving them alongside:
– Pumpkin Spice Lattes: The warm spices complement the flavors of the cookies beautifully.
– Apple Cider: Served warm, it adds a seasonal touch that pairs well with the sweet treats.
– Milkshakes: Try making chocolate or vanilla milkshakes with a dash of food coloring to match the Halloween theme.
When it comes to storing your cookies, keep them in an airtight container at room temperature for up to a week. For longer freshness, consider freezing them. Simply layer cookies with parchment paper in a freezer-safe container, and they can last up to three months. When you’re ready to enjoy them, thaw at room temperature or pop them in the microwave for a few seconds to bring back their freshness.
Conclusion
Spooky Halloween Spider Cookies are not just a treat; they’re a delightful addition to any Halloween celebration. Their unique design and delicious flavor make them a hit at parties, school events, or cozy family gatherings. Embrace your creativity in the kitchen this Halloween season, and don’t hesitate to try new designs and flavors!
Baking is not only about the end product but also about the joy of creating and sharing with others. So gather your loved ones, whip up a batch of these spooky delights, and enjoy the Halloween festivities together. Happy baking!