Introduction
Lemon Bliss Loaf is the perfect balance of sweet and tangy, making it an irresistible treat for any occasion. This delightful loaf cake combines the brightness of fresh lemon juice and zest with the richness of buttery batter, creating a moist and flavorful dessert that’s sure to impress. Whether you’re looking to brighten up your coffee break, celebrate a special occasion, or simply indulge in a sweet treat, this lemon loaf provides a refreshing twist on traditional baking.
Originating from classic quick bread recipes, the Lemon Bliss Loaf is celebrated for its simplicity and versatility. It can be served for breakfast, as an afternoon snack, or as a light dessert after dinner. The bright flavor of lemon not only elevates the cake but also brings a sense of freshness that can brighten even the dullest of days.
In this article, we will explore the ingredients, detailed instructions, and various ways to enjoy this delightful dessert, ensuring you have everything you need to create this Lemon Bliss Loaf in your kitchen.
Understanding the Ingredients
To achieve the perfect Lemon Bliss Loaf, it’s crucial to understand the role each ingredient plays in the final result. Each component contributes to the texture, flavor, and overall experience of this delightful loaf.
All-Purpose Flour and Leavening Agents
The foundation of the Lemon Bliss Loaf is all-purpose flour. It provides the necessary structure and stability to the cake. The gluten proteins in the flour help create a light and tender crumb, which is essential for a loaf cake.
Leavening agents, such as baking powder and baking soda, are critical in making the loaf rise. Baking powder, a combination of an acid and a base, helps provide the lift needed for a light texture. Baking soda, on the other hand, is often used in recipes that contain acidic ingredients, such as lemon juice. When combined, these agents create bubbles of carbon dioxide that expand in the oven, resulting in a fluffy and airy loaf.
Sugars and Fats
Granulated sugar is not just a sweetener; it also plays a crucial role in the texture of the Lemon Bliss Loaf. Sugar helps to create a tender crumb by interfering with gluten formation, allowing the cake to remain moist and soft. Additionally, sugar enhances the caramelization process, contributing to a beautiful golden crust.
Unsalted butter is the primary fat in this recipe, providing richness and flavor. Using unsalted butter allows you to control the salt content of your loaf, ensuring that the sweet and tangy flavors shine through. The fat in butter also helps to keep the loaf moist and adds to the overall buttery flavor that complements the citrus notes beautifully.
Eggs and Dairy
Eggs serve multiple functions in baking. They act as binders, helping to hold the ingredients together, while also adding moisture. The proteins in eggs coagulate during baking, which gives the loaf its structure. The addition of eggs contributes to a richer flavor and a tender texture, making them an essential component in the Lemon Bliss Loaf.
Sour cream is another key ingredient, adding creaminess and a slight tang that pairs perfectly with the lemon. The acidity in sour cream not only enhances the flavor of the loaf but also reacts with the baking soda, helping to create a lighter texture.
Citrus Elements
The star of the show in this recipe is undoubtedly the fresh lemon juice and zest. Fresh lemon juice adds a vibrant acidity that balances the sweetness of the sugar, while the lemon zest infuses the loaf with essential oils and a concentrated lemon flavor. Together, these citrus elements create a bright and refreshing taste that elevates the entire loaf. Using fresh lemons is crucial; bottled lemon juice lacks the depth of flavor that fresh juice provides.
Preparing for Baking
Before diving into the mixing and baking process, proper preparation is essential for achieving the best results. Ensuring your kitchen is ready will help streamline the process and prevent any missteps.
Prepping the Oven and Pan
Preheating your oven is one of the most important steps in baking. It ensures that your Lemon Bliss Loaf begins to bake immediately upon entering the oven, promoting even cooking and a good rise. Preheat your oven to 350°F (175°C) for optimal results.
While the oven is heating, prepare your loaf pan. Greasing the pan is crucial to prevent the loaf from sticking. You can use unsalted butter or a cooking spray to coat the pan. For added security, consider lining the bottom and sides of the pan with parchment paper, allowing for easy removal of the loaf once it’s baked.
Measuring Ingredients Accurately
Accurate measurement of ingredients is vital in baking. Unlike cooking, where you can often adjust flavors on the fly, baking requires precise ratios for the best outcome. Use a kitchen scale for dry ingredients when possible, as this can yield more consistent results than using measuring cups.
For ingredients like butter, ensure it’s softened to room temperature before creaming. This allows for better incorporation of air into the mixture, leading to a lighter loaf. Similarly, eggs should be at room temperature to help them mix more thoroughly into the batter.
Step-by-Step Instructions
Now that you understand the ingredients and have prepared your kitchen, it’s time to dive into the step-by-step instructions for making your Lemon Bliss Loaf.
Mixing the Dry Ingredients
Start by gathering your dry ingredients: all-purpose flour, baking powder, baking soda, and a pinch of salt. In a medium mixing bowl, combine the flour with the baking powder, baking soda, and salt. Whisk these dry ingredients together until well blended. This step is crucial as it ensures that the leavening agents are evenly distributed throughout the flour, promoting an even rise in your loaf.
Sifting or whisking dry ingredients is recommended because it helps to aerate the flour, preventing clumps and resulting in a lighter batter. This process also mixes the leavening agents with the flour, which is essential for consistent baking.
Creaming Butter and Sugar
In a separate large mixing bowl, begin the creaming process by adding your softened unsalted butter and granulated sugar. Using an electric mixer, beat the butter and sugar together on medium speed until the mixture is light and fluffy. This process usually takes about 3-5 minutes. The goal is to incorporate air into the butter, which will help create a tender texture in your loaf.
As you cream the butter and sugar, you may notice the mixture turning pale and increasing in volume. This is a good sign that you’re on the right track. Scrape down the sides of the bowl occasionally to ensure that all the butter and sugar are well combined.
Incorporating Eggs and Flavorings
Once your butter and sugar mixture is fluffy, it’s time to add the eggs. Crack the eggs into a small bowl to check for shell fragments, then add them one at a time to the butter and sugar mixture, beating well after each addition. This gradual incorporation helps to emulsify the mixture, leading to a smoother batter.
After adding the eggs, it’s time to introduce the fresh lemon juice and lemon zest. Stir these citrus elements into the mixture until just combined. The lemon juice will add moisture, while the zest will infuse the batter with that vibrant lemon flavor. Be careful not to overmix at this stage, as overmixing can lead to a denser loaf.
With the wet ingredients mixed together, you’re now ready to combine them with the dry ingredients, creating a delightful Lemon Bliss Loaf that’s sure to be a hit at your next gathering or as a sweet treat just for yourself.

Best Practices for Adding Eggs One at a Time
When making your Lemon Bliss Loaf, the integration of eggs is crucial for achieving the perfect texture. Begin by cracking each egg into a separate bowl to prevent any shell fragments from getting into your batter. After the initial mixing of your butter and sugar, add the first egg and blend it in on low speed until fully incorporated. This method allows the egg to emulsify properly with the fats in the batter, creating a light and airy loaf.
Repeat this process for the subsequent eggs, ensuring that each one is fully mixed before adding the next. This step is essential because it helps to create a stable structure for the loaf, allowing it to rise beautifully during baking. By adding eggs one at a time, you also minimize the risk of overmixing, which can lead to a dense and heavy loaf.
How to Effectively Mix in Flavorings Without Overmixing
Incorporating flavorings into your batter can elevate your Lemon Bliss Loaf to new heights. When adding lemon zest, vanilla extract, or any other flavorings, it’s important to do so gently. Use a spatula to fold in these ingredients rather than using a mixer. This method ensures that the flavorings are evenly distributed throughout the batter without the risk of overmixing, which can negatively impact the texture.
The goal is to combine the ingredients until just blended. Overmixing can lead to gluten development, which results in a tougher loaf. By folding in your flavorings carefully, you maintain the light and tender crumb that is characteristic of a well-made lemon loaf.
Adding Sour Cream
Techniques for Gently Folding in Sour Cream
Sour cream is a key ingredient in this recipe, contributing to the moisture and tanginess of the Lemon Bliss Loaf. To incorporate sour cream into your batter, spoon it into the mixing bowl after the eggs and flavorings have been added. Use a spatula to fold the sour cream in gently. Start by cutting through the batter and then lifting it over the sour cream, turning the bowl as you go. This technique prevents the batter from becoming overly dense and maintains the integrity of the ingredients.
The Benefit of Incorporating Dairy for Moisture
Incorporating dairy like sour cream not only adds moisture but also improves the flavor profile of the loaf. The acidity in sour cream reacts with the baking soda, creating a tender crumb and enhancing the loaf’s rise. This balance of moisture and acidity is paramount in achieving a light and fluffy lemon loaf that doesn’t dry out.
Combining Wet and Dry Mixtures
Importance of Mixing on Low Speed
Once you have your wet mixture ready, it’s time to combine it with the dry ingredients. Begin by sifting your flour, baking powder, and salt together in a separate bowl. This step aerates the flour, helping to create a lighter texture in your loaf. When you’re ready to mix the wet and dry ingredients, do so at a low speed. This will help to gently combine everything without overworking the batter.
Signs to Look for to Avoid Overmixing
As you mix the wet and dry ingredients together, keep an eye out for signs that the batter is ready. You want to mix just until there are no visible streaks of flour. The batter should be slightly lumpy, which is a good indication that it’s not overmixed. If you see a smooth and glossy batter, you’ve likely mixed too much, which can lead to a denser loaf.
Pouring and Baking the Loaf
Tips for Evenly Spreading Batter in the Pan
Once your batter is perfectly mixed, it’s time to pour it into your prepared loaf pan. Use a spatula to scrape the batter from the bowl, ensuring you get every bit of that delicious mixture. Pour the batter into the center of the pan and use the spatula to gently spread it out toward the edges. This technique helps to minimize air bubbles and ensures an even rise while baking.
How to Test for Doneness Using a Toothpick
Baking times can vary depending on your oven, so it’s crucial to know when your loaf is done. Start checking for doneness about 5 minutes before the end of the recommended baking time. Insert a toothpick into the center of the loaf; if it comes out clean or with a few moist crumbs clinging to it, the loaf is ready. If the toothpick comes out wet with batter, give it a few more minutes in the oven and check again.
Cooling and Glazing
Cooling the Lemon Loaf
Cooling your Lemon Bliss Loaf properly is essential for achieving the right texture and flavor. After removing the loaf from the oven, let it cool in the pan for about 10-15 minutes. This step allows the loaf to firm up slightly and makes it easier to remove from the pan without breaking.
Once it’s cool enough to handle, gently turn the loaf out onto a wire rack to cool completely. This allows air to circulate around the loaf, preventing sogginess and ensuring a perfect crust.
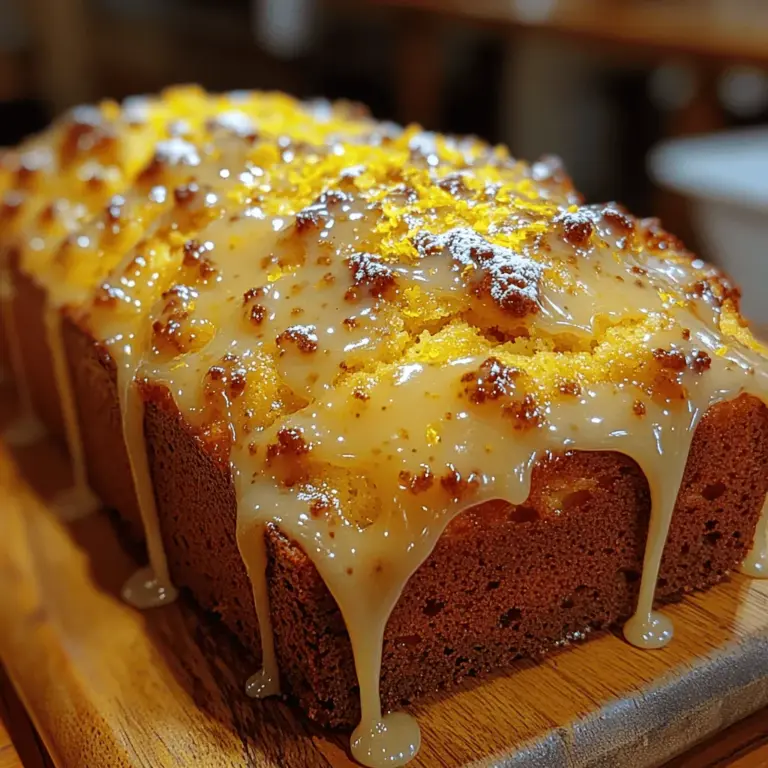
Preparing the Glaze
To prepare the glaze, combine powdered sugar and fresh lemon juice in a bowl. Start by whisking them together until you achieve a smooth consistency. If the glaze is too thick, add a little more lemon juice until it reaches a pourable texture. For an extra touch of flavor, consider adding a bit of lemon zest to the glaze for an intensified citrus experience.
Techniques for Drizzling Glaze Over the Loaf for Even Coverage
To achieve an even coverage of glaze on your Lemon Bliss Loaf, use a spoon or a small whisk to drizzle the glaze over the top of the cooled loaf. Start from one end and move to the other, allowing the glaze to flow down the sides. If you prefer a thicker layer of glaze, you can repeat this process after the first layer has set for a few minutes.
Enjoying Your Lemon Bliss Loaf
Serving Suggestions
The Lemon Bliss Loaf is incredibly versatile and can be enjoyed in various ways. It pairs beautifully with a cup of herbal tea or coffee, making it an ideal afternoon snack or light dessert. For a more indulgent experience, consider serving slices of the loaf with a dollop of whipped cream or a scoop of vanilla ice cream.
When it comes to slicing, use a serrated knife to ensure clean cuts without squishing the loaf. After slicing, store any leftovers in an airtight container at room temperature for up to three days or in the refrigerator for up to a week. For longer storage, freeze individual slices wrapped in plastic wrap, then place them in a freezer-safe bag for up to three months.
Creative Variations
While the classic Lemon Bliss Loaf is delightful on its own, you can easily customize it to suit your taste preferences. For added texture, consider folding in poppy seeds or fresh blueberries to the batter before baking. These additions complement the lemon flavor while providing a delightful crunch or burst of juiciness.
For a twist on the glaze, try substituting some of the lemon juice with lime or orange juice for a citrus medley. Alternatively, you could top the loaf with a simple cream cheese frosting instead of a glaze for a richer, creamier experience.
Nutritional Information
Breakdown of Ingredients
Each slice of Lemon Bliss Loaf provides a balance of indulgence and nutrition. On average, a slice contains approximately 200 calories, depending on the ingredients used and the size of the cut. The loaf is rich in carbohydrates from the flour and sugar, while the eggs and sour cream contribute protein and healthy fats.
The bright lemon flavor comes from the zest and juice, providing not only a refreshing taste but also a boost of vitamin C, making it a more wholesome treat. Keeping portion sizes in mind, this loaf can be a delightful addition to your baking repertoire without straying too far from a balanced diet.
Conclusion
Lemon Bliss Loaf is a delightful dessert that brings a burst of citrus flavor to your table. With its simple ingredients and straightforward preparation, this recipe is a fantastic way to enjoy baking while creating a sweet treat that is perfect for sharing. Whether enjoyed as a snack, dessert, or a special treat for guests, this lemon loaf is sure to become a favorite in your recipe collection. Experience the bright, refreshing flavors of lemon in every slice, and make this scrumptious loaf a staple in your baking repertoire. Enjoy your baking adventure and savor every bite of your homemade Lemon Bliss Loaf.