Introduction
If you’re in search of a dessert that perfectly marries the creamy richness of cheesecake with the vibrant freshness of berries, look no further than Berry Bliss Cheesecake Bars. These delightful treats are not only visually stunning but also incredibly satisfying for the palate. With their luscious layers of cream cheese filling and fresh berry toppings, they offer a refreshing alternative to traditional cakes. Cheesecake bars, in general, have gained immense popularity for their convenience—easy to slice, serve, and enjoy. Whether you’re hosting a summer gathering or simply indulging in a sweet craving, these bars are sure to impress.
One of the most appealing aspects of cheesecake bars is their versatility. You can experiment with a variety of flavors, from classic strawberry to exotic mango, but the combination of cream cheese and fresh berries remains a crowd favorite. The tartness of blueberries perfectly complements the creamy filling, creating a balance that delights the taste buds. In this article, we’ll explore how to make Berry Bliss Cheesecake Bars, breaking down the ingredients and guiding you through each step of the process to ensure your baking success.
Understanding the Ingredients
Breakdown of Key Ingredients for the Crust
To create the perfect foundation for your Berry Bliss Cheesecake Bars, it’s essential to start with a well-made crust. The crust not only adds texture but also serves as a delicious contrast to the creamy filling. The key ingredients for the crust include:
– Graham Cracker Crumbs: This classic choice provides a sweet, slightly nutty flavor and a crunchy texture. The distinct taste of graham crackers is synonymous with cheesecake and adds a comforting familiarity to the dessert.
– Melted Unsalted Butter: Butter is crucial for binding the crumbs together, ensuring that the crust holds its shape once baked. The richness of unsalted butter enhances the overall flavor without overpowering the sweetness of the dessert.
– Granulated Sugar: A touch of sugar is added to elevate the sweetness of the crust, balancing the flavors of the filling. It helps in caramelizing the crust slightly during baking, contributing to its golden-brown color.
Importance of Cream Cheese in the Filling
The filling is the star of the show, and cream cheese is its primary ingredient. When it comes to the texture and flavor of the cheesecake, quality matters. Here’s why cream cheese is so pivotal:
– Texture: Cream cheese should be at room temperature to ensure it mixes smoothly, resulting in a silky texture that is essential for a successful cheesecake. When properly blended, it creates a creamy filling without any lumps.
– Flavor: The tangy flavor of cream cheese complements the sweetness of the berries beautifully. It adds depth and richness, making each bite a delightful experience.
The Role of Eggs in Setting the Filling
Eggs play a crucial role in the structure of cheesecake. They act as a binding agent, helping the filling to set as it bakes. Here’s what you need to know:
– Binding and Structure: Eggs provide stability to the filling, allowing it to hold its shape when cut into bars. This is especially important for cheesecake bars, as they need to maintain their form for easy serving.
– Creaminess: When beaten and incorporated into the cream cheese mixture, eggs contribute to the overall creaminess of the filling, enhancing the mouthfeel.
Flavor Enhancers: Vanilla Extract and Lemon Juice
To elevate the flavor profile of your cheesecake filling, consider adding:
– Vanilla Extract: A staple in many desserts, vanilla extract adds a warm, aromatic note that enhances the overall flavor of the cheesecake. Opt for pure vanilla extract for the best quality.
– Lemon Juice: A splash of lemon juice brightens the filling, countering the sweetness with a hint of acidity. This balance is crucial in achieving a well-rounded flavor, making the dessert feel refreshing rather than overly rich.
Highlighting the Fresh Blueberries
No Berry Bliss Cheesecake Bars would be complete without the star ingredient: fresh blueberries. Here’s what you need to know:
– Nutritional Benefits: Blueberries are not only delicious but also packed with antioxidants, vitamins, and minerals. They are low in calories and high in nutrients, making them a healthy choice for dessert.
– Flavor Profile: The natural sweetness and slight tartness of blueberries pair beautifully with the creamy cheesecake filling. They provide bursts of flavor in every bite, making the bars even more enjoyable.
– Tips for Using Fresh Versus Frozen Blueberries: While fresh blueberries are preferred for their vibrant flavor and texture, frozen blueberries can also be used. If you choose to go this route, make sure to thaw them and drain any excess moisture to prevent the filling from becoming too watery.
Description of the Topping Ingredients
For the finishing touch on your Berry Bliss Cheesecake Bars, a simple topping can make all the difference:
– Sour Cream: Adding a layer of sour cream on top of the cheesecake filling provides an extra creamy texture and a tangy flavor that contrasts nicely with the sweetness of the berries. It adds a luxurious finish, making the bars even more decadent.
– Additional Berries: Top your bars with more fresh blueberries or a mix of other berries, such as raspberries or strawberries, for an eye-catching presentation. Not only do they enhance the visual appeal, but they also add extra flavor.
Step-by-Step Instructions
Now that you have a solid understanding of the ingredients, let’s dive into the step-by-step process of making Berry Bliss Cheesecake Bars.
Setting the Stage: Preheating the Oven and Preparing the Baking Dish
Before you start mixing ingredients, it’s crucial to prepare your workspace.
1. Preheat Your Oven: Set your oven to 325°F (163°C) to ensure it reaches the perfect temperature for baking your cheesecake bars. Preheating is essential as it helps in even cooking and prevents the crust from becoming soggy.
2. Prepare Your Baking Dish: Line an 8×8-inch baking dish with parchment paper, allowing some overhang on the sides. This will make it easier to lift the bars out of the dish once they’re cool. Lightly grease the parchment paper with cooking spray for added insurance against sticking.
Crafting the Perfect Crust
Now it’s time to create the crust that will support your cheesecake filling.
1. Combine the Ingredients: In a mixing bowl, combine 1 ½ cups of graham cracker crumbs, ½ cup of granulated sugar, and ½ cup of melted unsalted butter. Stir until the mixture resembles wet sand.
2. Press the Mixture: Pour the crust mixture into the prepared baking dish. Using the bottom of a measuring cup or your fingers, firmly press the mixture into an even layer across the bottom of the dish. Be sure to compact it well to create a sturdy base.
3. Bake the Crust: Place the crust in the preheated oven and bake for about 10-12 minutes, or until it turns lightly golden. This step is crucial as it helps to set the crust and enhances its flavor through slight caramelization.
Mixing Techniques for an Even Texture
Once your crust is baking, you can turn your attention to the cheesecake filling.
1. Beat the Cream Cheese: In a large mixing bowl, beat 16 ounces of softened cream cheese with an electric mixer on medium speed until smooth and creamy. This should take about 2-3 minutes. Scrape down the sides of the bowl to ensure all the cream cheese is well incorporated.
2. Add the Sugar and Eggs: Gradually add ¾ cup of granulated sugar, mixing until combined. Then, add 2 large eggs, one at a time, mixing on low speed to prevent overmixing. Each egg should be fully incorporated before adding the next.
3. Incorporate Flavorings: Add 1 teaspoon of vanilla extract and 2 tablespoons of fresh lemon juice to the mixture. Beat on low speed until everything is well combined, ensuring a smooth and even texture.
Importance of Baking Until Golden
1. Add the Blueberries: Gently fold in 1 cup of fresh blueberries into the cheesecake filling. Be careful not to crush them; you want whole berries for bursts of flavor in your bars.
2. Pour and Bake: Pour the cheesecake filling over the baked crust, spreading it evenly with a spatula. Return the dish to the oven and bake for 25-30 minutes, or until the edges are set but the center still has a slight jiggle. The cheesecake will continue to firm up as it cools.
3. Cool Completely: Once baked, remove the cheesecake bars from the oven and allow them to cool at room temperature for about an hour. Then, transfer them to the refrigerator to chill for at least 4 hours or overnight for the best results.
Preparing the Cheesecake Filling
While the crust is baking and the filling is being prepared, it’s essential to keep an eye on the texture.
– Ensure that the filling is smooth and free of lumps, as this will contribute to the overall quality of your cheesecake bars.
As you prepare the filling, remember to have fun and feel free to experiment with the flavors. Whether you want to introduce more berries or even a hint of chocolate, the world is your oyster when it comes to cheesecake variations.
With all these steps completed, you’re well on your way to creating Berry Bliss Cheesecake Bars that are not only visually appealing but also bursting with flavor. Stay tuned for the next steps to add the finishing touches and serve these delightful desserts.

Tips for Achieving a Smooth Mixture
When crafting the perfect Berry Bliss Cheesecake Bars, achieving a silky, smooth filling is paramount. A smooth mixture not only enhances the texture of the cheesecake but also contributes to its overall visual appeal. To ensure this, start by using room-temperature cream cheese. Cold cream cheese can lead to lumps, which are difficult to remove once mixed.
Using an electric mixer or a stand mixer will provide even mixing power. Begin on low speed to avoid splattering, then gradually increase the speed as the mixture starts to come together. This method prevents air from being introduced prematurely, which can cause cracks in the cheesecake during baking. Aim to mix just until combined; over-mixing can introduce too much air, leading to a less desirable texture.
Importance of Proper Mixing to Avoid Lumps
The key to a creamy cheesecake lies in how well you mix your ingredients. Proper mixing reduces the risk of lumps forming, which can negatively affect the final product. After you have softened the cream cheese, add in your granulated sugar. This step is crucial because the sugar crystals help to break down the cream cheese as they mix, resulting in a smoother texture.
When adding eggs, do so one at a time, mixing thoroughly after each addition. This ensures that each egg is fully incorporated before adding the next, preventing any pockets of unmixed ingredients. If you notice any lumps during mixing, stop and scrape down the sides of the bowl before continuing. This will help you achieve that velvety consistency that is characteristic of a well-made cheesecake.
Incorporating the Blueberries
Now, it’s time to bring in the star ingredient – the blueberries. Fresh blueberries are ideal, but if you’re using frozen ones, make sure they are thawed and drained well to avoid excess moisture. Gently fold the blueberries into the cheesecake mixture using a spatula. This is crucial as it prevents the berries from breaking apart and turning the filling a muddy color.
Techniques to Evenly Distribute Berries Without Sinking
To evenly distribute the blueberries throughout the cheesecake batter without them sinking to the bottom, consider tossing the berries in a bit of flour before incorporating them. This light coating helps to prevent the berries from sinking during baking. Moreover, use a folding motion rather than vigorous stirring; this will keep the blueberries intact while ensuring they are well-distributed throughout the mixture.
Pouring and Baking the Cheesecake
Once your mixture is smooth and the blueberries are evenly incorporated, pour the cheesecake batter into your prepared crust. Use a spatula to spread the batter evenly across the crust, smoothing the top for an appealing finish. When baking, place the cheesecake bars in the center of your oven to ensure even cooking.
Indicators for Doneness and Texture
Baking times can vary depending on your oven, but as a general guideline, bake the cheesecake bars for about 45-55 minutes. The cheesecake is done when the edges are set, and the center has a slight jiggle. It will continue to firm up as it cools, so it’s essential not to overbake. A perfectly baked cheesecake will have a creamy texture and a slight sheen on the surface.
Preparing the Topping While the Cheesecake Bakes
While your cheesecake is baking, you can prepare a delicious topping. A simple mixture of sour cream, powdered sugar, and a hint of vanilla can create a creamy and slightly tangy contrast to the sweetness of the cheesecake.
The Balance of Sweetness in the Topping
When making the topping, it’s essential to taste as you go. The sour cream’s tanginess should balance the sweetness of the powdered sugar, creating a harmonious blend that complements the cheesecake. Adjust the sweetness as needed, keeping in mind that the topping will also add a layer of richness.
Adding the Topping for a Perfect Finish
Once the cheesecake has finished baking, remove it from the oven and immediately spread the topping over the surface. Use a spatula to create an even layer. Return the cheesecake to the oven for an additional 10-15 minutes. This step allows the topping to set slightly, enhancing the texture of the final product.
Timing for Baking the Topping
Keep an eye on the topping while it’s baking. You’ll know it’s ready when it appears set and slightly firm to the touch. Avoid overbaking, as this can cause the topping to crack. Once done, remove the cheesecake from the oven and let it cool at room temperature before transferring it to the refrigerator.
Cooling and Chilling the Cheesecake for Optimal Texture
Cooling the cheesecake at room temperature before chilling is crucial. Letting it cool gradually helps prevent cracks from forming. After about an hour, cover the cheesecake with plastic wrap and refrigerate for at least 4 hours, or overnight if possible. This refrigeration period allows the cheesecake to firm up and develop its flavors fully.
Importance of Refrigeration in Setting the Bars
The refrigeration process is not just about setting the bars; it also enhances the overall flavor profile. As the cheesecake sits, the flavors meld together, and the texture transitions from a soft batter to a firm yet creamy delight. This step is essential for achieving the perfect slice.
Serving Suggestions and Presentation
When it comes time to serve your Berry Bliss Cheesecake Bars, presentation can elevate the dish. Here are a few ideas to make your cheesecake bars visually appealing and delicious:
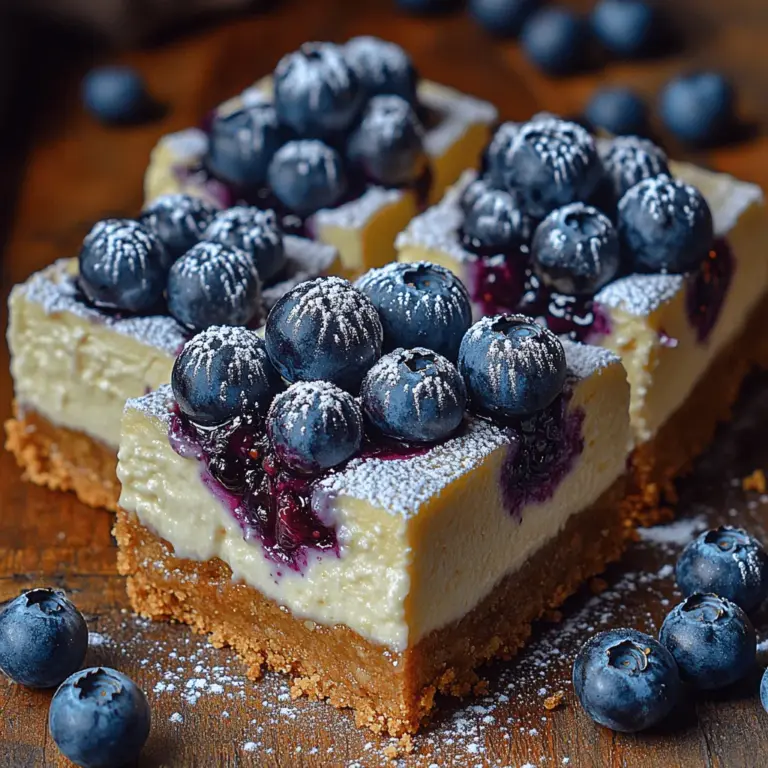
Ideas for Garnishing the Cheesecake Bars
Consider garnishing each slice with fresh blueberries to amplify their berry flavor. A sprinkle of powdered sugar can add a touch of elegance, while a drizzle of blueberry sauce or a berry compote can create a vibrant contrast against the creamy cheesecake. For added texture, crushed graham crackers or toasted coconut can provide a delightful crunch.
Creative Serving Ideas for Gatherings or Special Occasions
For gatherings or special occasions, serve the cheesecake bars on a beautiful platter, garnished with additional berries and mint leaves for a fresh touch. You can also cut them into bite-sized squares for easy serving; these mini portions make for perfect finger food at parties.
Pairing Suggestions (e.g., Coffee, Tea)
When it comes to beverages, pairing your Berry Bliss Cheesecake Bars with a cup of coffee or a refreshing cup of herbal tea can enhance the dining experience. The creamy richness of the cheesecake contrasts beautifully with the bitterness of coffee, while the lightness of tea can cleanse the palate.
Nutritional Benefits of Berry Bliss Cheesecake Bars
While indulgent, Berry Bliss Cheesecake Bars can also provide nutritional benefits thanks to their wholesome ingredients.
Overview of the Health Benefits of the Ingredients Used
Blueberries, the star of this dessert, are known for their high antioxidant content, which can help combat oxidative stress in the body. They are also rich in vitamins C and K, as well as dietary fiber. The cream cheese provides calcium and protein, while the graham cracker crust offers a source of carbohydrates.
Nutritional Value of Blueberries
Blueberries are often heralded as a superfood due to their numerous health benefits. They are low in calories yet high in nutrients, making them a guilt-free addition to your dessert. One cup of blueberries contains approximately 84 calories, 4 grams of fiber, and 24% of the daily recommended intake of vitamin C.
Balance of Indulgence and Healthiness in Dessert
These cheesecake bars strike a balance between indulgence and healthiness. While they are a sweet treat, the presence of fruit and the use of lower-fat cream cheese options can make them a more wholesome choice compared to traditional desserts. Enjoying them in moderation can allow you to satisfy your sweet tooth while also benefiting from the nutrients found in the ingredients.
Conclusion
Making Berry Bliss Cheesecake Bars is a delightful experience that combines the joy of baking with the satisfaction of sharing a delicious dessert. The ease of preparation, coupled with the scrumptious results, makes this recipe a winner for any occasion.
Whether you’re serving these bars at a family gathering, a potluck, or simply enjoying them at home, they are sure to impress. The combination of a creamy filling, fresh blueberries, and a sweet topping makes for a dessert that is both visually appealing and delicious.
Encouraging readers to try their hand at this recipe, the delight of sharing Berry Bliss Cheesecake Bars with friends and family is an experience that brings everyone together. So gather your ingredients, follow the steps, and enjoy the sweet bliss of these unforgettable cheesecake bars.
