Introduction
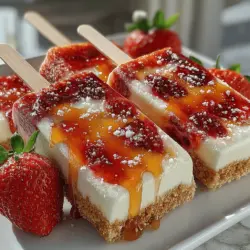
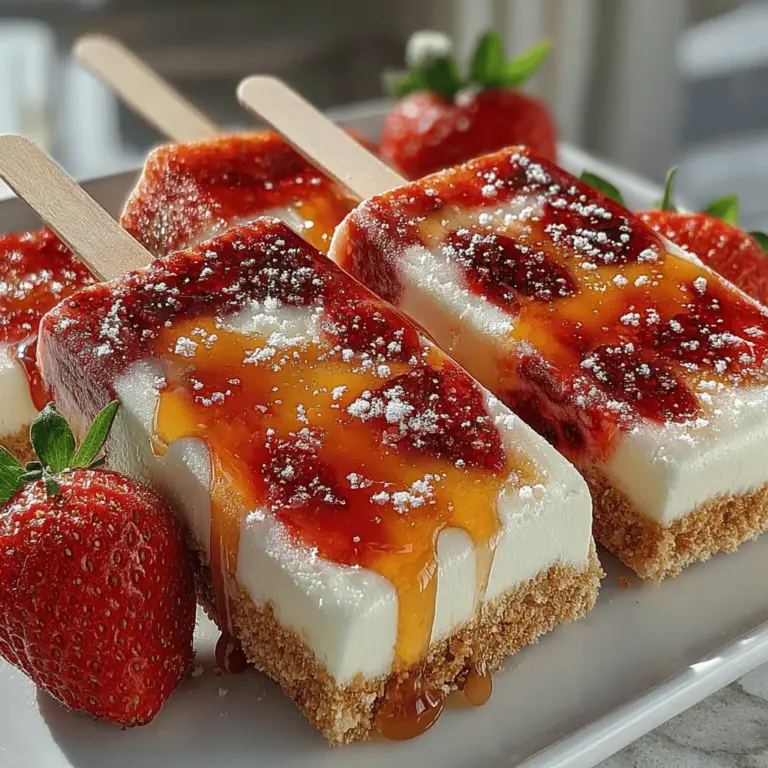
As the days grow warmer and the sun shines brighter, nothing beats the heat quite like a cold, refreshing treat. Enter the Fruity Strawberry Bliss Pops—a delightful homemade popsicle recipe that combines the sweetness of fresh strawberries with the creamy richness of Greek yogurt. This treat is not only a feast for the eyes with its vibrant red hue, but it also offers a healthy alternative to store-bought frozen snacks, making it appealing for both kids and adults.
Homemade popsicles like these are an excellent way to indulge in a frozen dessert while controlling the ingredients and serving sizes. They allow for creativity in the kitchen and can easily be tailored to suit various tastes and dietary preferences. With just a few simple steps, you can create a batch of Fruity Strawberry Bliss Pops that will keep your family cool and satisfied all summer long.
The Allure of Fruity Strawberry Bliss Pops
The Fruity Strawberry Bliss Pops are a celebration of summer in every bite. Bursting with flavor and a stunning red color, these popsicles look as good as they taste. Each pop is a harmonious blend of juicy strawberries and creamy Greek yogurt, creating a texture that is both smooth and enjoyable. Beyond their deliciousness, these pops are packed with nutritional benefits, making them an excellent choice for health-conscious individuals.
Strawberries are not just a sweet treat; they are a powerhouse of vitamins and antioxidants. Rich in vitamin C, manganese, and folate, strawberries contribute to overall health and wellness. They are also low in calories, making them an ideal ingredient for anyone looking to indulge without the guilt. When combined with Greek yogurt, known for its high protein content and probiotics, these pops become a nutritious snack that supports digestive health and muscle recovery.
Whether enjoyed as an afternoon refresher, a post-workout snack, or a fun dessert for the kids, these Fruity Strawberry Bliss Pops are versatile and easy to prepare, ensuring that everyone in the family can enjoy a healthy frozen treat.
Key Ingredients for Fruity Strawberry Bliss Pops
Creating the perfect batch of Fruity Strawberry Bliss Pops begins with choosing the right ingredients. Here’s a closer look at the key components that make these pops so delicious and nutritious.
Fresh Strawberries
The star ingredient of this recipe is, of course, fresh strawberries. These juicy berries are not only delicious but also come with a plethora of health benefits. They are high in antioxidants, which help combat oxidative stress, and they contain significant amounts of dietary fiber, promoting digestive health.
When selecting strawberries, look for plump, vibrant red berries with a bright green crown. Avoid any that show signs of mold or bruising, as these can affect the flavor and quality of your popsicles. For the best taste, consider using organic strawberries, which are often more flavorful and free from pesticide residues.
Greek Yogurt
Next up is Greek yogurt, the creamy base that gives these popsicles their rich texture. Greek yogurt is an excellent source of protein, calcium, and probiotics, making it a nutritious addition to your diet. It not only enhances the flavor of the pops but also contributes to a satisfying mouthfeel.
If you’re looking for alternatives, you can substitute Greek yogurt with non-dairy yogurt options like coconut or almond yogurt. Keep in mind that these alternatives may alter the flavor and texture slightly, so choose one that aligns with your dietary preferences.
Sweeteners
To elevate the flavor of your Fruity Strawberry Bliss Pops, you’ll need a natural sweetener. Options like honey and maple syrup are both popular choices, each bringing its unique flavor profile. Honey imparts a floral sweetness, while maple syrup adds a rich, caramel-like depth.
When adjusting the sweetness, start with a small amount and taste the mixture before adding more. The natural sweetness of the strawberries may be sufficient for your palate, so you may not need much additional sweetener.
Vanilla Extract
Vanilla extract is a simple yet effective flavor enhancer that can elevate your popsicles to a whole new level. Just a splash of pure vanilla extract will add warmth and depth to the overall flavor profile of your pops. Always opt for pure vanilla extract over imitation varieties for the best taste.
Optional Ingredients
While the base recipe is delightful on its own, there are optional ingredients you can incorporate to customize your Fruity Strawberry Bliss Pops further. For instance, a squeeze of lemon juice can brighten the flavors and add a tangy twist that complements the sweetness of the strawberries. Additionally, consider adding other fruits or a splash of fruit juice for a unique twist on this classic recipe.
Preparation Steps for Fruity Strawberry Bliss Pops
Now that you have gathered all your ingredients, it’s time to dive into the preparation of your Fruity Strawberry Bliss Pops. The process is straightforward, making it a perfect activity for families or a fun weekend project.
Step 1: Prepare the Strawberries
Begin by washing the strawberries thoroughly under cool running water to remove any dirt or residues. Once clean, remove the green tops and slice the strawberries into quarters. This will make them easier to mash and blend later.
For added flavor enhancement, consider macerating the strawberries. To do this, place the sliced strawberries in a bowl, and sprinkle a little sugar or sweetener over them. Allow them to sit for about 10-15 minutes. This will help release their juices and intensify their natural sweetness.
Step 2: Mash the Strawberries
Once the strawberries have macerated, it’s time to mash them. You can use a fork, potato masher, or even a food processor for this step, depending on the consistency you prefer. If you enjoy a bit of texture in your pops, a simple mash will do. For a smoother blend, pulse them in a food processor until you achieve your desired consistency.
Step 3: Combine Ingredients
In a mixing bowl, combine the mashed strawberries with Greek yogurt, your chosen sweetener, and a splash of vanilla extract. Stir until all the ingredients are well incorporated. You can taste the mixture at this stage and adjust the sweetness if necessary, adding more honey or maple syrup until it reaches your desired level of sweetness.
Step 4: Fill the Molds
Once your mixture is ready, it’s time to fill the popsicle molds. If you’re feeling adventurous, you can layer the strawberry mixture with additional yogurt or even other fruit purees for a visually stunning effect. Use a spoon or funnel to carefully pour the mixture into the molds, leaving a little space at the top to allow for expansion as they freeze.
Step 5: Insert Sticks and Freeze
After filling the molds, insert the popsicle sticks and place the molds in the freezer. Allow them to freeze for at least 4-6 hours or until completely solid. For best results, let them freeze overnight, ensuring they are firm enough to remove from the molds without breaking.
By following these steps, you’ll soon have a batch of Fruity Strawberry Bliss Pops ready to enjoy. This fun and nutritious treat is sure to become a favorite for everyone in your household, perfect for cooling off on a hot summer day or satisfying a sweet tooth without the guilt.

Mixing the Yogurt Base: Achieving the Perfect Creamy Consistency
To create the ideal yogurt base for your Fruity Strawberry Bliss Pops, start by selecting high-quality yogurt. Greek yogurt works particularly well due to its thick and creamy texture, which results in a luxurious mouthfeel once frozen.
Step-by-Step Instructions for the Yogurt Base:
1. Choose Your Yogurt: Opt for plain, unsweetened yogurt to control the sweetness of your pops. Alternatively, you can use flavored yogurt for an extra taste boost.
2. Sweetening: Add a sweetener of your choice—honey, maple syrup, or agave—depending on your dietary preferences. Start with two tablespoons, tasting as you go to reach your desired sweetness level.
3. Mixing: In a mixing bowl, combine the yogurt and sweetener. Whisk until smooth and creamy. If you prefer a lighter texture, fold in a splash of milk or a dairy-free alternative to thin it out slightly.
This creamy yogurt base serves not only as a delightful flavor component but also adds essential protein and calcium to your pops, enhancing their nutritional value.
Layering the Pops: Importance of Texture and Aesthetics in Popsicle Making
Layering is a crucial step in creating visually appealing and texturally interesting popsicles. The interplay between the creamy yogurt base and fresh strawberry puree adds depth to each bite.
Layering Instructions:
1. Prepare the Strawberry Puree: Blend fresh strawberries with a splash of lemon juice and a bit of sweetener until smooth. If you like some chunkiness, pulse the strawberries lightly instead of blending them completely.
2. Layering Technique: Start by adding a spoonful of the yogurt base into your popsicle molds, followed by a layer of strawberry puree. Repeat this process until you reach the top of the molds, ensuring that the layers are visible for a stunning presentation.
3. Creating Swirls: Using a skewer or a toothpick, gently swirl the layers together for an artistic finish. This not only enhances the appearance but also allows the flavors to blend beautifully.
Inserting Sticks: Best Practices for Easy Removal
Properly inserting the popsicle sticks is essential for ease of handling and removal. Here’s how to do it:
1. Timing: Allow your layered pops to freeze for about 1-2 hours until slightly firm but not completely frozen. This firmness will help the sticks stay upright while minimizing the risk of them tilting.
2. Inserting the Sticks: Carefully insert the sticks into the center of each mold, ensuring they are positioned straight. If the sticks wobble, give them a gentle adjustment to secure them in place.
Freezing: Optimal Freezing Times and What to Expect
Once your sticks are securely in place, it’s time to freeze the pops until fully set.
Freezing Instructions:
1. Freezing Duration: Place the molds in the freezer for at least 4-6 hours, or ideally overnight. The longer they freeze, the firmer and more enjoyable they will be.
2. Perfect Pops: When ready, the pops should be solid to the touch. They should not bend or flex when you attempt to remove them from the molds.
Releasing the Pops: Safe Methods for Removing from Molds
Removing the pops from their molds can sometimes be a tricky task. Here are a few safe methods to ensure a smooth release:
1. Warm Water Method: Fill a bowl with warm water and dip the bottom of the popsicle mold into the water for about 10-15 seconds. This slight warming will help loosen the pops without melting them.
2. Gentle Pulling: After the molds have warmed slightly, gently pull on the popsicle stick while twisting it slightly. If the pop resists, return it to the warm water for a few more seconds.
Garnishing: Creative Options for Enhancing Flavor and Presentation
Garnishing your Fruity Strawberry Bliss Pops not only elevates their visual appeal but also adds an extra layer of flavor. Here are some creative ideas:
1. Fresh Fruit Toppings: Before serving, add slices of fresh strawberries or other berries on top for a burst of color and flavor.
2. Nut Butter Drizzle: A light drizzle of almond or peanut butter can add a rich taste that complements the fruitiness of the pops.
3. Coconut Flakes: Sprinkle unsweetened coconut flakes over the surface for a tropical vibe and added texture.
Serving Suggestions and Variations
Ideal Occasions for Serving Fruity Strawberry Bliss Pops
These delightful pops are perfect for a variety of occasions:
– Summer Barbecues: Serve them as a refreshing dessert option that everyone will love.
– Kids’ Birthday Parties: Their vibrant color and fruity flavor make them a hit with children.
– Healthy Snack Time: Offer these pops as a nutritious treat during snack breaks or after school.
Flavor Variations: Adding Other Fruits or Mix-Ins for Creativity
Feel free to experiment with flavors! Here are some delicious variations to try:
1. Berry Medley: Combine strawberries with blueberries, raspberries, or blackberries for a mixed berry delight.
2. Tropical Twist: Blend in some mango or pineapple puree for a refreshing tropical flavor.
3. Creamy Banana Pops: Substitute half of the yogurt with ripe banana for a creamy, banana-flavored treat.
Dietary Adaptations: Vegan Alternatives and Allergen-Friendly Modifications
For those with dietary restrictions, these pops can easily be modified:
– Vegan Version: Use coconut yogurt or almond yogurt instead of dairy yogurt and substitute maple syrup for honey.
– Nut-Free Options: Ensure toppings and mix-ins are nut-free to cater to allergy concerns.
Nutritional Information
Breakdown of the Health Benefits of Each Main Ingredient
Fruity Strawberry Bliss Pops are not just delicious; they also pack a nutritional punch:
– Strawberries: Rich in vitamin C and antioxidants, strawberries help boost immunity and promote heart health.
– Yogurt: A great source of protein and probiotics, yogurt supports digestive health and builds muscle.
– Natural Sweeteners: Using honey or agave provides energy without the refined sugars found in many store-bought pops.
Caloric Content and Macros per Pop
Each Fruity Strawberry Bliss Pop contains approximately 60-80 calories, depending on the ingredients and sweeteners used. The macros generally break down to:
– Protein: 2-3 grams
– Fat: 1-2 grams
– Carbohydrates: 12-15 grams
Comparison with Store-Bought Popsicles
Unlike many store-bought pops full of artificial colors and preservatives, these homemade pops are made from fresh ingredients, ensuring a healthier alternative. You control the sweetness and can avoid any allergens, making them a much better choice for health-conscious individuals and families.
Conclusion
Making Fruity Strawberry Bliss Pops at home is a delightful way to enjoy a healthy dessert that the whole family can love. Not only do they offer a refreshing taste and creamy texture, but they also provide numerous health benefits from their wholesome ingredients.
So why not experiment with different flavors and ingredients? The possibilities are endless, and creating these pops can be a fun activity for kids and adults alike. Embrace the joy of making healthy and delicious desserts, and watch as your family enjoys every fruity bite. Enjoy your pops, and may they bring smiles to your summer days!