Introduction
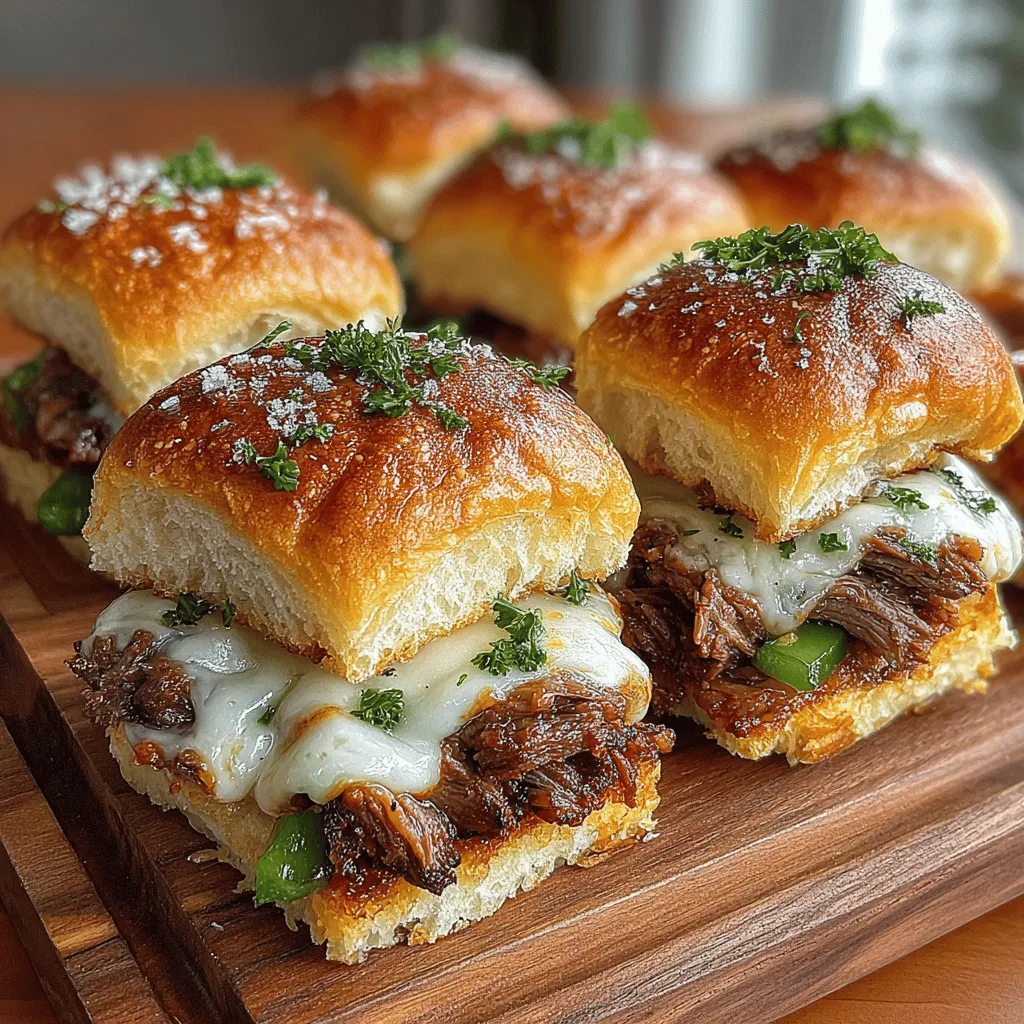
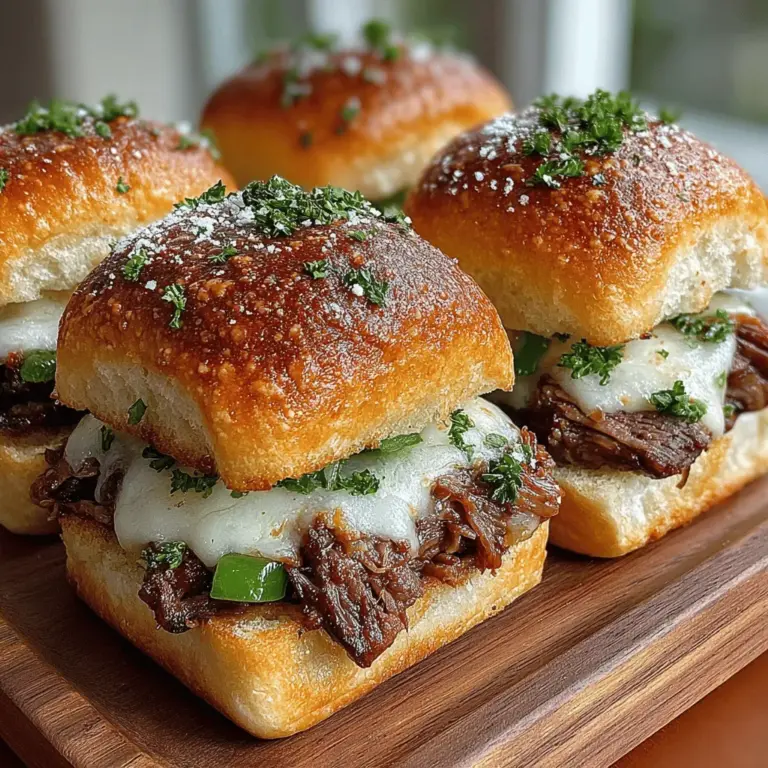
In the realm of quick and satisfying snacks, Cheesy Philly Cheesesteak Sliders have garnered a reputation as a beloved favorite among food enthusiasts. These delectable mini sandwiches encapsulate all the rich flavors of a traditional Philly cheesesteak, but in a convenient, bite-sized format that is perfect for any occasion—be it game days, festive parties, or casual family gatherings. Imagine sinking your teeth into a warm, fluffy slider filled with tender flank steak, sautéed vegetables, and a generous layer of melted provolone cheese. This combination not only satisfies hunger but also delivers a burst of flavor that leaves an impression on everyone at the table.
In this article, we will explore the essential ingredients that make up these scrumptious sliders, the step-by-step preparation process, and some handy tips to ensure that your Cheesy Philly Cheesesteak Sliders are nothing short of extraordinary.
Understanding the Ingredients
To create the perfect Cheesy Philly Cheesesteak Sliders, it’s crucial to understand the core components that contribute to their incredible taste and texture. Let’s dive into each ingredient and learn why they are essential to this recipe.
– Flank Steak: Why This Cut is Ideal for Sliders
Flank steak is a favorite among chefs when it comes to making cheesesteaks, and for good reason. This cut of beef is known for its bold flavor and relatively low fat content, which allows it to soak up marinades and seasonings beautifully. When sliced thinly against the grain, flank steak becomes incredibly tender, making it the ideal filling for sliders. The key to achieving that melt-in-your-mouth texture lies in the proper slicing technique and cooking method, which we will cover in detail later.
– The Role of Olive Oil in Cooking
Olive oil is not just a cooking medium; it plays a vital role in enhancing the flavor of the ingredients. It helps to sauté the vegetables while adding a subtle richness to the meat. Using high-quality extra virgin olive oil can elevate the overall taste of the sliders and is a healthier alternative to many other cooking fats.
– Importance of Fresh Vegetables: Onions and Bell Peppers
No Philly cheesesteak is complete without the aromatic addition of sautéed onions and bell peppers. These vegetables not only add a pop of color but also provide a sweet and savory depth to the filling. Caramelizing the onions brings out their natural sugars, while the bell peppers contribute a slight crunch and fresh flavor that balances the richness of the cheese and meat.
– Seasoning Choices: Garlic Powder, Salt, and Pepper
The right seasoning can make or break a dish, and for Cheesy Philly Cheesesteak Sliders, a simple blend of garlic powder, salt, and pepper is all you need to enhance the flavors of the meat and vegetables. Garlic powder delivers a subtle but impactful taste, while salt and pepper elevate the overall profile without overpowering the other ingredients.
– The Perfect Slider Rolls: Choosing the Right Bread
When it comes to slider rolls, the choice of bread is crucial. You want a roll that is soft yet sturdy enough to hold the filling without falling apart. Traditional options include small hoagie rolls or soft brioche sliders. These types offer a slightly sweet flavor that complements the savory filling beautifully.
– Provolone Cheese: The Creamy Essential
Provolone cheese is the classic choice for Philly cheesesteaks, known for its creamy texture and mild flavor. When melted, it becomes gooey and stretchy, creating that iconic cheesesteak experience. For those who prefer a bit more kick, sharp provolone or even a mix of cheeses can be used for a more robust flavor profile.
– Creating the Sauce: Mayonnaise, Dijon Mustard, and Worcestershire Sauce
A blend of mayonnaise, Dijon mustard, and Worcestershire sauce creates a zesty sauce that adds moisture and flavor to the sliders. This combination provides a creamy texture with a hint of tanginess, which perfectly complements the savory components of the dish. Mixing these ingredients before assembling your sliders ensures an even distribution of flavor.
– The Final Touch: Fresh Parsley for Garnish
While not strictly necessary, a sprinkle of fresh parsley can elevate the presentation of your sliders and add a touch of freshness. This simple garnish enhances the visual appeal and provides a subtle herbal note that brightens the overall flavor.
Step-by-Step Preparation Guide
Now that we’ve covered the essential ingredients, let’s get started on the preparation process for your Cheesy Philly Cheesesteak Sliders. With each step, you’ll be one step closer to creating a dish that your friends and family will rave about.
– Preparing the Flank Steak to Perfection
The first step in making these sliders is to prepare the flank steak. Start by placing the steak in the freezer for about 30 minutes before slicing. This will firm up the meat, making it easier to cut thinly. Once chilled, use a sharp knife to slice the flank steak against the grain into thin strips, roughly 1/4 inch thick. This is essential for ensuring tenderness in each bite.
– Cooking Flank Steak: Achieving Optimal Flavor and Texture
Heat a tablespoon of olive oil in a large skillet over medium-high heat. Once the oil is hot, add the sliced flank steak in a single layer, ensuring not to overcrowd the pan. Allow the meat to sear for about 2-3 minutes without stirring, which helps develop a nice crust. After searing, stir the meat and cook for an additional 2-3 minutes until it reaches your desired level of doneness. Remove the cooked steak from the skillet and set it aside.
– Sautéing the Vegetables for Flavor
In the same skillet, add another tablespoon of olive oil if needed, then toss in sliced onions and bell peppers. Sauté these vegetables, stirring occasionally, until they are soft and caramelized, approximately 5-7 minutes. This process will enhance their natural sweetness and flavor, making them a perfect pairing with the steak.
With these initial preparation steps completed, you are well on your way to crafting Cheesy Philly Cheesesteak Sliders that will impress at any gathering. Stay tuned for the next part of the article, where we will dive deeper into the assembly and cooking of these delightful sliders.

Best Practices for Sautéing Onions and Bell Peppers
Sautéing onions and bell peppers is an essential step in crafting your Cheesy Philly Cheesesteak Sliders. The way you prepare these vegetables can elevate the overall flavor of your sliders significantly. Here are some best practices to ensure you achieve perfect sautéed onions and bell peppers:
1. Choose the Right Pan: Use a large, heavy-bottom skillet or sauté pan. A cast-iron skillet retains heat well and ensures even cooking, which is crucial for caramelization.
2. Heat the Pan: Preheat your skillet over medium heat. This allows the vegetables to cook evenly without burning. If the heat is too high, the sugars in the onions can burn before they have a chance to caramelize, leading to a bitter taste.
3. Add Oil: Use a combination of olive oil and butter for sautéing. The olive oil has a higher smoke point, while the butter adds richness and flavor. A tablespoon of each should suffice.
4. Slice Uniformly: Cut your onions and bell peppers into uniform pieces to ensure they cook evenly. Thin slices for onions will caramelize beautifully, while bell peppers should be cut into strips or bite-sized pieces for easy layering in your sliders.
5. Season Early: Season your vegetables with a pinch of salt as soon as they hit the pan. This helps to draw out moisture and enhances the flavor throughout the cooking process.
6. Patience is Key: Allow the vegetables to cook slowly, stirring occasionally. For perfect caramelization, onions need about 10-15 minutes to turn golden brown. Bell peppers should be tender and vibrant, taking about 5-7 minutes.
The Importance of Caramelization in Flavor Development
Caramelization is a crucial process in cooking that transforms the natural sugars in onions and bell peppers into complex flavors. When sautéed properly, these vegetables develop a sweet, rich flavor that adds depth to your sliders. Here’s why caramelization matters:
– Enhanced Sweetness: Caramelization brings out the sweetness in onions and bell peppers, which balances the savory flavors of the steak and cheese in your sliders.
– Complex Flavor Profile: The Maillard reaction, which occurs during caramelization, creates a variety of flavor compounds that enhance the overall taste experience. You’ll notice a nutty, rich taste that elevates your dish.
– Visual Appeal: The golden-brown color achieved through caramelization not only enhances flavor but also adds an appealing aesthetic to your sliders, making them more enticing to the eye.
Crafting the Perfect Sauce
A delicious sauce can take your Cheesy Philly Cheesesteak Sliders from good to unforgettable. Here’s how to create a sauce that balances flavors perfectly.
Balancing Flavors: Mixing Mayonnaise, Dijon Mustard, and Worcestershire Sauce
This sauce is all about balance. Here’s a simple formula to follow:
1. Base: Start with 1/2 cup of mayonnaise, which provides a creamy texture and richness.
2. Tang: Add 1 tablespoon of Dijon mustard for a sharp, tangy flavor that complements the savory steak.
3. Umami Boost: Incorporate 1 teaspoon of Worcestershire sauce to add depth and a hint of sweetness. This ingredient is key to achieving a well-rounded flavor.
4. Mix and Taste: Combine all ingredients in a small bowl and whisk until smooth. Taste and adjust. You might want to add a pinch of garlic powder or hot sauce for extra flavor.
Tips for Customizing the Sauce to Suit Your Taste
– Herbs and Spices: Consider adding fresh herbs like chopped parsley or dill for a fresh kick. Alternatively, a sprinkle of smoked paprika can add a smoky depth.
– Heat Factor: If you prefer a spicy kick, mix in a dash of hot sauce or some sriracha. Adjust to your heat tolerance.
– Vegan Option: For a plant-based alternative, swap mayonnaise with a vegan version or Greek yogurt for a lighter option.
Assembling Your Sliders Like a Pro
Now that you have your sautéed vegetables and sauce ready, it’s time to assemble your sliders. Here’s how to do it with precision.
Techniques for Layering Ingredients for Maximum Flavor
1. Start with the Bottom Bun: Place the bottom half of your slider rolls on a baking sheet lined with parchment paper.
2. Layering Order: Begin by spreading a layer of your prepared sauce on the bottom bun. This not only adds flavor but also creates a barrier that prevents the buns from getting soggy.
3. Add Steak: Layer a generous portion of sautéed steak over the sauce. Ensure that the meat is evenly distributed to provide consistent flavor in every bite.
4. Vegetable Layer: Next, add an even layer of the sautéed onions and bell peppers, allowing their sweetness to meld with the savory steak.
5. Cheese Please: Top with slices of provolone cheese, ensuring the cheese covers the entire layer. The cheese will melt and bind the ingredients together, creating a deliciously gooey texture.
6. Top Bun: Finally, spread some sauce on the inside of the top bun before placing it on top of the cheese.
How to Properly Prepare Slider Rolls for Baking
1. Baking Sheet: Make sure your baking sheet is lined with parchment paper for easy cleanup and to prevent sticking.
2. Butter the Top: Brush the tops of the slider buns with melted butter. This will encourage browning and add flavor during baking.
3. Cover with Foil: To ensure that the sliders heat evenly and the cheese melts perfectly, cover the baking sheet with aluminum foil.
Baking for the Perfect Finish
Baking your sliders correctly is vital for achieving that perfect finish. Here are the steps to follow:
Preheating and Preparing Your Oven
1. Preheat: Set your oven to 350°F (175°C) and allow it to fully preheat. This ensures your sliders cook evenly from the start.
2. Placement: Once preheated, place your baking sheet in the center of the oven for uniform heat distribution.
Wrapping for Optimal Heat Distribution
– Covering: As mentioned, covering the sliders with aluminum foil helps to trap steam, keeping the buns soft while allowing the cheese to melt thoroughly.
– Remove the Cover: After about 10-15 minutes of baking, remove the foil and bake for an additional 5-7 minutes. This will allow the tops to become golden brown and crispy.
Signs That Your Sliders Are Ready to Serve
– Melted Cheese: The cheese should be fully melted and starting to bubble.
– Golden Buns: Look for a golden crust on the top of the buns, indicating they are baked to perfection.
– Heated Through: The sliders should be hot throughout; you can check by inserting a toothpick in the center and ensuring it comes out warm.
Serving Suggestions
Presenting Your Cheesy Philly Cheesesteak Sliders
When it comes to serving your sliders, presentation is just as important as taste. Here are some ideas on how to plate your sliders for maximum visual appeal:
– Plating: Arrange the sliders on a large serving platter or cutting board. You can cut them in half diagonally for a more rustic look.
– Garnishing: Add fresh parsley or chives on top for a pop of color. You can also serve with pickles or jalapeños on the side for an added crunch.
Ideal Pairings: Sides to Serve with Your Sliders
Complement your sliders with sides that enhance the meal experience:
– Fries: Classic French fries or sweet potato fries are fantastic accompaniments. Consider serving them with a dipping sauce like ranch or garlic aioli.
– Salad: A light, refreshing salad can balance the richness of the sliders. A simple mixed greens salad with a vinaigrette works well.
– Coleslaw: A tangy coleslaw adds crunch and acidity, perfectly cutting through the richness of the cheesesteak.
Creative Ways to Serve: Plating and Garnishing Tips
– Skewers: For a fun twist, consider serving your sliders on skewers. This makes them easy to grab and adds an appealing touch.
– Miniature Sides: Serve small bowls of dipping sauces, such as ketchup, mustard, or your special sauce, for guests to customize their sliders.
Conclusion
Cheesy Philly Cheesesteak Sliders are not just a treat for the taste buds; they are a celebration of flavors and textures that bring people together. This recipe combines simplicity with taste, making it accessible for both novice cooks and seasoned chefs. With each bite, you experience the savory infusion of flank steak, the sweetness of sautéed onions and peppers, and the richness of melted provolone cheese, all enhanced by a tangy sauce. Whether you’re serving them for a special occasion or a casual meal, these sliders are sure to become a beloved favorite in your culinary repertoire. Enjoy the process of creating these delicious bites and the joy they bring to your table.

