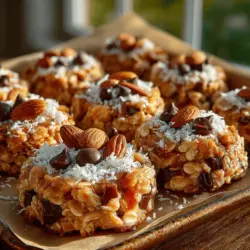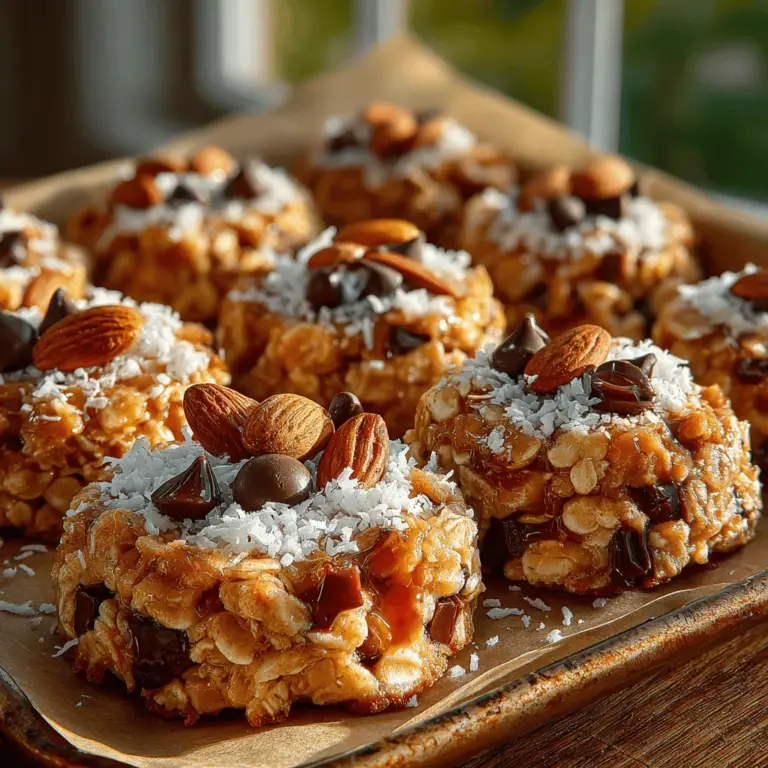
Chilly Nutty Delight: Frozen Peanut Butter Oat Clusters
Introduction
In today’s fast-paced world, finding healthy snack options that are both delicious and satisfying can be a challenge. Enter the Chilly Nutty Delight: Frozen Peanut Butter Oat Clusters—a delightful recipe that perfectly balances convenience with wholesome nutrition. This snack is not only quick to prepare but also packs a flavorful punch that is sure to please both kids and adults alike. With its combination of nutty, sweet, and chocolatey flavors, these frozen clusters are a treat you can feel good about indulging in.
The beauty of this recipe lies in its versatility. Whether you’re following a specific dietary regimen or simply looking for a wholesome snack, these clusters can be easily adapted to fit a variety of preferences. They are gluten-free, can be made vegan, and cater to different nut allergies by allowing substitutions. This makes them an ideal option for families or gatherings where dietary needs may vary.
Understanding the Ingredients
To truly appreciate the Chilly Nutty Delight, it’s essential to understand the core ingredients that contribute to both its taste and health benefits. Each component plays a significant role, ensuring that you not only enjoy a delicious treat but also nourish your body with wholesome goodness.
Rolled Oats
At the heart of this recipe are rolled oats, which serve as the primary ingredient. These whole grains are celebrated for their rich fiber content, which promotes heart health and aids in digestion. Oats are also known for their ability to keep you feeling full longer, making them a perfect base for a snack. In the context of this recipe, rolled oats provide structure and texture, giving the clusters their satisfying chewiness. They also absorb the flavors of the other ingredients, enhancing the overall taste of the final product.
Peanut Butter or Nut Butter Alternative
Next up is peanut butter, a beloved ingredient known for its creamy texture and rich flavor. Packed with protein and healthy fats, peanut butter not only adds a delightful taste but also contributes to your nutritional intake. If you’re looking for alternatives, almond butter or sunflower seed butter can be excellent substitutes, catering to those with peanut allergies or who prefer different flavor profiles. Each nut butter option offers its own unique health benefits, ensuring that you can customize the recipe to your liking while still enjoying its nutritious perks.
Sweeteners: Honey vs. Maple Syrup
Sweetness is a key component of this recipe, and choosing the right sweetener can greatly impact both flavor and health benefits. Honey is a classic choice, known for its rich flavor and natural sweetness. However, for those following a vegan diet, maple syrup is an excellent alternative that provides a distinct taste while still being health-conscious. Both options offer natural sugars that can give you a quick energy boost without the crash associated with refined sugars. Understanding the nuances between these sweeteners allows you to tailor the flavor profile of your clusters to suit your palate.
Mini Chocolate Chips
To elevate the flavor of these clusters, mini chocolate chips are added, bringing a delightful indulgence to each bite. The richness of chocolate complements the nutty flavors and provides a sweet contrast to the oats. Depending on your preference, you can choose between dark chocolate for a more intense flavor or milk chocolate for a sweeter touch. The use of mini chips ensures that each cluster is generously studded with chocolate, making every mouthful a treat.
Chopped Nuts
For those who love a bit of crunch, chopped nuts are an excellent addition to the clusters. Packed with healthy fats, nuts not only enhance the texture but also provide a satisfying crunch that elevates the overall experience of this snack. You can opt for walnuts, pecans, or even hazelnuts, each bringing its own unique taste and nutritional profile. This ingredient not only adds flavor but also increases the clusters’ nutritional value, making them even more satisfying.
Sea Salt and Vanilla Extract
Finally, a pinch of sea salt and a splash of vanilla extract play crucial roles in this recipe. Sea salt enhances the overall flavor, bringing out the sweetness of the other ingredients and creating a more balanced taste. Meanwhile, quality vanilla extract adds depth and warmth, making the clusters feel more indulgent. Using high-quality ingredients ensures that you achieve the best possible flavor, transforming simple components into a delightful snack.
Step-by-Step Recipe Guide
With a solid understanding of the ingredients, it’s time to dive into the preparation of your Chilly Nutty Delight: Frozen Peanut Butter Oat Clusters. The first step in this journey is to prepare your baking sheet, which is essential for a smooth and easy cleanup process. Lining your baking sheet with parchment paper or a silicone mat not only prevents sticking but also helps in maintaining the shape of your clusters.
Once your baking sheet is prepped, gather all your ingredients and tools, ensuring that you’re ready to create this delicious snack without any interruptions. This initial organization will make the entire process much more enjoyable and efficient.
Now that you’re ready to get started, the next steps will guide you through the mixing and molding of your ingredients into delightful clusters that will soon become your go-to snack. Stay tuned as we delve deeper into the step-by-step instructions that will lead you to your very own Frozen Peanut Butter Oat Clusters.