Introduction to Choco-Banana Bliss Bars
Welcome to the delightful world of Choco-Banana Bliss Bars, a perfect blend of nutritious ingredients that satisfy your sweet tooth without compromising your health. These bars are not just a simple dessert; they embody a harmonious balance of taste and nutrition, making them an ideal snack for any occasion. Whether you’re looking for a quick breakfast option, a post-workout boost, or a healthy dessert, these bliss bars can do it all.
What sets these bars apart is their ease of preparation. With just a handful of wholesome ingredients, you can whip up a batch in no time. Packed with the goodness of bananas, oats, and nut butters, they provide a quick energy boost while indulging in the rich flavors of chocolate. The combination of these ingredients not only makes for a tasty treat but also ensures that you’re nourishing your body with every bite.
Understanding the Health Benefits of Choco-Banana Bliss Bars
Nutritional Advantages of Ripe Bananas
Bananas are often celebrated for their remarkable health benefits, making them a star ingredient in many nutritious recipes. One of the significant advantages of ripe bananas is their high potassium content. Potassium is an essential mineral that helps regulate blood pressure, supports muscle function, and contributes to overall heart health. Moreover, bananas are an excellent source of dietary fiber, which aids in digestion and promotes a feeling of fullness.
The natural sweetness of ripe bananas means that you can reduce the amount of added sugar in your recipes. This not only enhances the flavor of your Choco-Banana Bliss Bars but also makes them a healthier option compared to many conventional desserts. The sugars found in bananas are naturally occurring, making them an ideal choice for those looking to satisfy their sweet cravings in a healthier way.
The Role of Oats in a Balanced Diet
Oats are another critical ingredient in Choco-Banana Bliss Bars, renowned for their myriad health benefits. Rolled oats, in particular, are a great source of whole grains, providing essential nutrients such as iron, magnesium, and B vitamins. They are known to contribute to heart health by helping to lower LDL cholesterol levels, thus reducing the risk of heart disease.
Additionally, oats play a vital role in weight management. Their high fiber content can help keep you feeling full longer, reducing the likelihood of unhealthy snacking throughout the day. The complex carbohydrates found in oats also provide sustained energy, making them an excellent choice for anyone seeking a nutritious boost, especially before or after exercise.
Exploring the Benefits of Nut Flours
When it comes to the nut flour used in Choco-Banana Bliss Bars, almond flour is a popular choice. Almond flour is not only gluten-free but is also rich in healthy fats, protein, and fiber, making it a nutritious alternative to traditional flour. Its low carbohydrate content makes it suitable for those following low-carb diets, while its high vitamin E levels contribute to skin health and antioxidant protection.
Using nut flour like almond flour can enhance the texture and flavor of your bliss bars, providing a delightful nuttiness that complements the bananas and chocolate beautifully. For those who may have nut allergies, there are alternatives like sunflower seed flour that can provide similar nutritional benefits.
The Importance of Natural Sweeteners
In creating Choco-Banana Bliss Bars, the choice of sweetener plays an essential role in balancing flavor and health. Natural sweeteners like honey and maple syrup offer a healthier alternative to refined sugars. Both sweeteners contain antioxidants and have a lower glycemic index than regular sugar, meaning they cause a slower rise in blood sugar levels.
Honey, in particular, boasts antibacterial properties and can aid in digestive health, while maple syrup contains minerals such as manganese and zinc that support immune function. By opting for these natural sweeteners, you can enjoy the sweetness of your bars without the negative health impacts of refined sugars.
Essential Ingredients for Choco-Banana Bliss Bars
Fresh Bananas: The Key Ingredient
To achieve the best flavor and texture in your Choco-Banana Bliss Bars, starting with ripe bananas is crucial. Ripe bananas are sweeter and more flavorful, which enhances the overall taste of your bars. Additionally, the natural moisture content in ripe bananas helps to bind the ingredients together, ensuring that your bars remain chewy and delightful.
When selecting bananas, look for those with a few brown spots on the skin, indicating optimal ripeness. Overripe bananas can be mashed easily, making them perfect for mixing into your bliss bar batter.
Choosing the Right Oats
The type of oats you choose can significantly affect the texture of your Choco-Banana Bliss Bars. Rolled oats are typically the best option for this recipe, as they provide a hearty texture and chewiness that complements the other ingredients. Rolled oats are steamed and then flattened, which helps them cook more evenly and absorb moisture better than quick oats.
Quick oats, on the other hand, are processed more finely and cook faster, which may result in a softer bar. While you can use quick oats in a pinch, using rolled oats will yield the best results and ensure that your bars maintain their structure.
Selecting Nut Butters
Nut butter is another essential ingredient that adds creaminess and depth to Choco-Banana Bliss Bars. Almond butter and peanut butter are two popular choices, each bringing its unique flavor profile and nutritional benefits. Almond butter is typically lower in carbohydrates and higher in vitamin E, while peanut butter offers a rich, classic taste and is a good source of protein.
When selecting nut butter, opt for natural varieties without added sugars or hydrogenated oils. These versions are healthier and allow you to control the sweetness and consistency of your bars.
Dark Chocolate Chips: A Healthier Indulgence
No Choco-Banana Bliss Bar would be complete without the addition of chocolate. Dark chocolate chips are a healthier choice compared to milk chocolate, as they contain higher levels of cocoa solids, which are rich in antioxidants. These antioxidants can help reduce inflammation and support heart health.
When choosing dark chocolate chips, look for those with at least 70% cocoa content for maximum health benefits. The rich flavor of dark chocolate pairs perfectly with the sweetness of bananas and nut butter, making for a truly indulgent yet healthy treat.
Optional Add-ins: Nuts and More
To elevate your Choco-Banana Bliss Bars even further, consider incorporating optional add-ins. Chopped nuts like walnuts or pecans can add a delightful crunch and additional nutrition. Walnuts are particularly rich in omega-3 fatty acids, which are beneficial for heart health, while pecans provide antioxidants and fiber.
Other optional add-ins could include seeds, dried fruits, or even a sprinkle of cinnamon for extra flavor. Customizing your bars with these ingredients not only enhances their nutritional profile but also allows you to create a version that suits your taste preferences.
Step-by-Step Guide to Making Choco-Banana Bliss Bars
Prepping Your Baking Dish
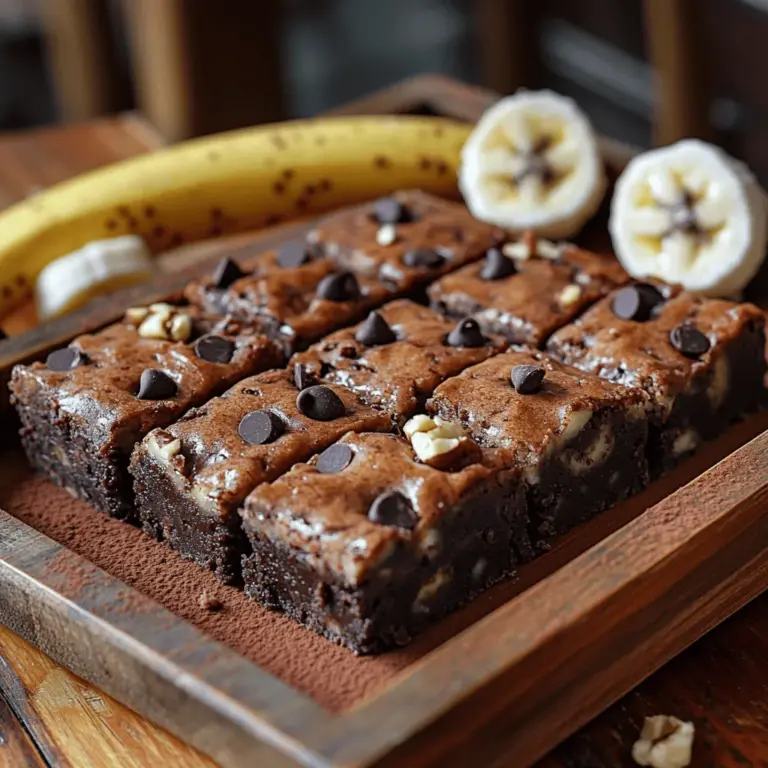
Before diving into the preparation of your Choco-Banana Bliss Bars, it’s essential to get your baking dish ready. Start by choosing an 8×8-inch or 9×9-inch square baking pan, which is the ideal size for creating perfectly portioned bars.
To prevent your bars from sticking, line the baking dish with parchment paper. This will make it easier to lift the bars out after baking and will help maintain their shape. Make sure to leave some overhang on the sides for easy removal. If you don’t have parchment paper on hand, you can lightly grease the pan with coconut oil or non-stick cooking spray to ensure a smooth release.
With your baking dish prepped, you’re now ready to start creating your delicious Choco-Banana Bliss Bars!
—
Stay tuned for the next section, where we will delve into the step-by-step instructions to bring these delightful treats to life! Through this engaging process, you’ll discover just how simple and rewarding it is to create your own healthy snacks at home.
{{image_1}}
Preparing the Baking Dish Properly for Easy Removal
Before diving into the mixing and baking steps, it is crucial to ensure your baking dish is prepared adequately. Properly greasing or lining the baking dish not only helps in the easy removal of the bars but also ensures clean cuts, allowing for neat presentation. For Choco-Banana Bliss Bars, you can use either parchment paper or non-stick cooking spray.
If using parchment paper, cut a piece large enough to cover the bottom and sides of the dish, leaving some overhang. This overhang will act as handles, making it easier to lift the bars out once they are baked and cooled. If you opt for a spray, make sure to coat the entire surface of the dish evenly. This step may seem minor, but it makes a significant difference in achieving perfect, intact bars.
Mixing Wet Ingredients: Achieving the Perfect Consistency
With the baking dish prepped, the next step involves mixing the wet ingredients. Start by mashing ripe bananas in a large mixing bowl. The riper the bananas, the sweeter and more flavorful your bars will be. Use a fork or potato masher to create a smooth, lump-free mixture.
Next, incorporate the melted coconut oil, maple syrup, and vanilla extract into the banana mash. Whisk these ingredients together until they are well combined. The goal is to achieve a consistent, creamy texture that allows for easy integration with the dry ingredients. Avoid overmixing, as this can introduce air into the mixture, causing the bars to become dense.
Combining Dry Ingredients: The Science Behind It
Now it’s time to focus on the dry ingredients, which play a crucial role in determining the texture and flavor of your Choco-Banana Bliss Bars. In a separate bowl, combine rolled oats, whole wheat flour, baking powder, and a pinch of salt.
Each dry ingredient has a specific purpose:
– Rolled Oats provide a chewy texture and help bind the bars together.
– Whole Wheat Flour adds density and gives the bars their structure.
– Baking Powder acts as a leavening agent, allowing the bars to rise slightly.
– Salt enhances the overall flavor, balancing the sweetness of the bananas and chocolate.
Mix the dry ingredients thoroughly to ensure even distribution of the baking powder and salt, which is key to achieving uniform texture and flavor in each bite.
Folding in Chocolate Chips and Nuts
Once your wet and dry ingredients are ready, it’s time to combine them. Pour the wet mixture into the bowl containing the dry ingredients. Using a spatula, gently fold the mixture together until just combined. Be careful not to overmix, as this can lead to tough bars.
After the wet and dry ingredients are blended, it’s time to incorporate the chocolate chips and chopped nuts. Use a folding technique to gently mix these ingredients into the batter, ensuring they are evenly distributed without breaking the chocolate chips or nuts. This careful approach maintains the integrity of the bars and results in a delightful surprise of chocolate and crunch in every bite.
Baking to Perfection
Preheat your oven to 350°F (175°C) and pour the batter into your prepared baking dish. Spread it out evenly, ensuring there are no air pockets. Bake the bars for approximately 20-25 minutes, but keep a close eye on them as baking times may vary depending on your oven.
To check for doneness, insert a toothpick into the center of the bars. If it comes out clean or with a few moist crumbs, they are ready. Avoid overbaking, as this can result in dry bars. Remember, they will continue to cook slightly once removed from the oven due to residual heat.
Cooling and Slicing: The Final Touch
Once baked, remove the dish from the oven and allow the bars to cool in the pan for about 10 minutes. This initial cooling period helps set the bars, making them easier to slice. After 10 minutes, lift the bars out using the parchment overhang and place them on a wire rack to cool completely.
Cooling is a vital step; it allows the bars to firm up, ensuring they hold their shape when sliced. Once fully cooled, use a sharp knife to cut the bars into squares or rectangles, depending on your preferred serving size.
Serving Suggestions and Pairing Ideas
Enjoying Choco-Banana Bliss Bars as a Snack
Choco-Banana Bliss Bars are not only delicious but also incredibly convenient, making them a perfect on-the-go snack. Pack a couple in your lunchbox for work or school, or enjoy one as an afternoon pick-me-up. Their combination of natural sweetness from the bananas and chocolate makes them a satisfying treat that won’t derail your healthy eating goals.
Pairing with Beverages
To enhance your experience with these blissful bars, consider pairing them with beverages that complement their flavors. A warm cup of herbal tea, such as chamomile or peppermint, provides a soothing contrast to the chocolatey richness. Alternatively, a refreshing smoothie made with spinach, almond milk, and a banana will create a wholesome snack or breakfast option that aligns perfectly with the bars’ flavors.
Creative Serving Ideas for Special Occasions
These bars can also shine at special gatherings. For parties, consider cutting them into bite-sized pieces and serving them on a colorful platter. You could drizzle some melted dark chocolate on top for an elegant touch or sprinkle with shredded coconut or chopped nuts for added texture and flavor. They make a great dessert alternative at birthday parties or family gatherings, providing a healthier option that everyone will enjoy.
Storage Tips for Maximum Freshness
Best Practices for Storing Choco-Banana Bliss Bars
To ensure your Choco-Banana Bliss Bars stay fresh, it’s essential to store them properly. Once cooled, store the bars in an airtight container at room temperature for up to four days. If you prefer them cold, you can refrigerate them, but be aware that chilling may slightly alter their texture.
For longer storage, wrap the bars individually in plastic wrap before placing them in an airtight container. This method will help maintain their freshness and prevent them from drying out.
Freezing for Future Enjoyment
If you want to save some for later, freezing is an excellent option. To freeze your Choco-Banana Bliss Bars, first slice them into desired portions. Then, wrap each piece tightly in plastic wrap or aluminum foil, ensuring they are well-sealed to prevent freezer burn. Place the wrapped bars in a freezer-safe bag or container and label with the date. They can be frozen for up to three months.
When you’re ready to enjoy a bar, simply remove it from the freezer and let it thaw at room temperature or warm it slightly in the microwave for a few seconds for that fresh-out-of-the-oven taste.
Conclusion: Embracing Health and Flavor with Choco-Banana Bliss Bars
Choco-Banana Bliss Bars are the perfect blend of health and indulgence, making them an ideal addition to your snacking repertoire. With wholesome ingredients like bananas, oats, and nuts, these bars are not only delicious but also provide a nutritious boost to your day. Whether you enjoy them as a quick snack, a post-workout treat, or a delightful dessert at gatherings, they are sure to please.
By preparing them at home, you can control the ingredients and customize them to suit your taste preferences. So why not try your hand at making these delightful bars? Embrace the satisfaction of homemade goodness and enjoy the flavorful combination of chocolate and banana guilt-free.
