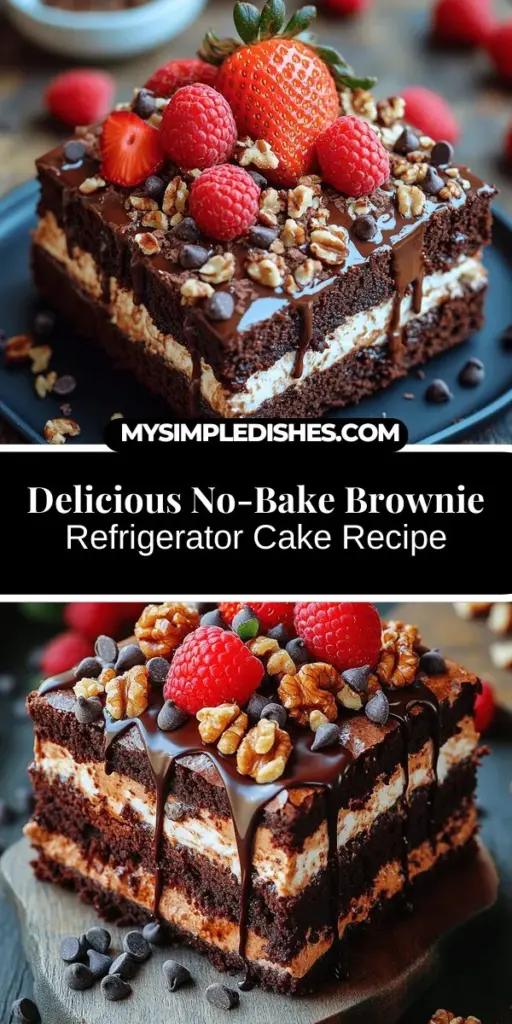
Indulging in a dessert that combines rich chocolate flavors with creamy textures is a universal pleasure. The Decadent Chocolate Delight: Brownie Refrigerator Cake is an exquisite choice for any occasion, offering a delightful contrast of textures and tastes. This no-bake dessert is simple to prepare, making it a perfect treat for both novice and experienced bakers. Whether it’s a family gathering, a birthday celebration, or just a sweet craving at home, this cake is sure to impress.
This dessert stands out not only for its taste but also for its convenient preparation method. Unlike traditional cakes that require extensive baking and cooling times, the Brownie Refrigerator Cake allows you to whip up something delicious with minimal oven time. The key to achieving its decadent flavor lies in the combination of rich brownies and a luscious creamy filling, creating a harmonious blend that melts in your mouth.
In this article, we will explore the detailed process of creating this delicious dessert, from ingredient selection to serving suggestions. We will also discuss the uniqueness of this recipe and why it has become a favorite among chocolate lovers. Whether you are looking to impress guests or simply satisfy a sweet tooth, the Decadent Chocolate Delight: Brownie Refrigerator Cake is the ultimate solution.
Understanding the Ingredients
Exploring the Core Components of the Dessert
A successful dessert starts with quality ingredients, and the Brownie Refrigerator Cake is no exception. Each component plays a vital role in creating the final product’s flavor and texture. Let’s take a closer look at the essential ingredients that make this cake a decadent treat.
– Brownie Mix: The foundation of our cake is a moist and fudgy brownie mix. While you can opt for homemade brownies, using a pre-made mix streamlines the process, allowing you to focus on the creamy layers that elevate this dessert. The rich chocolate base provides the first layer of flavor that pairs beautifully with the creamy toppings.
– Heavy Whipping Cream: This ingredient is crucial for adding lightness and richness to the dessert. When whipped, heavy cream transforms into a fluffy, airy texture that balances the density of the brownies. It serves as the main element in our creamy filling, creating a delightful contrast between the layers.
– Mascarpone Cheese: Known for its creamy texture and subtle flavor, mascarpone cheese adds depth to the dessert. It contributes to the richness of the cream mixture, ensuring a luxurious mouthfeel that enhances the overall experience.
– Powdered Sugar: Sweetening the cream mixture is essential, and powdered sugar is the ideal choice. Its fine texture dissolves easily, ensuring a smooth and sweet filling without any graininess.
– Vanilla Extract: Enhancing the overall flavor, vanilla extract adds warmth and complexity to the dessert. Its aromatic qualities complement the chocolate perfectly, creating a well-rounded taste profile.
– Chocolate Syrup: For an extra rich chocolate experience, chocolate syrup is drizzled into the cream mixture. This not only intensifies the chocolate flavor but also contributes to the overall visual appeal of the dessert.
– Crushed Nuts: Adding crunch and texture, crushed nuts provide a delightful contrast to the creamy layers. They can also introduce a nutty flavor that pairs well with chocolate, making each bite more interesting.
– Chocolate Chips: A chocolate lover’s dream, chocolate chips are folded into the cream mixture or sprinkled on top for added richness. They melt slightly into the creamy layers, creating pockets of chocolate goodness that enhance the cake’s flavor.
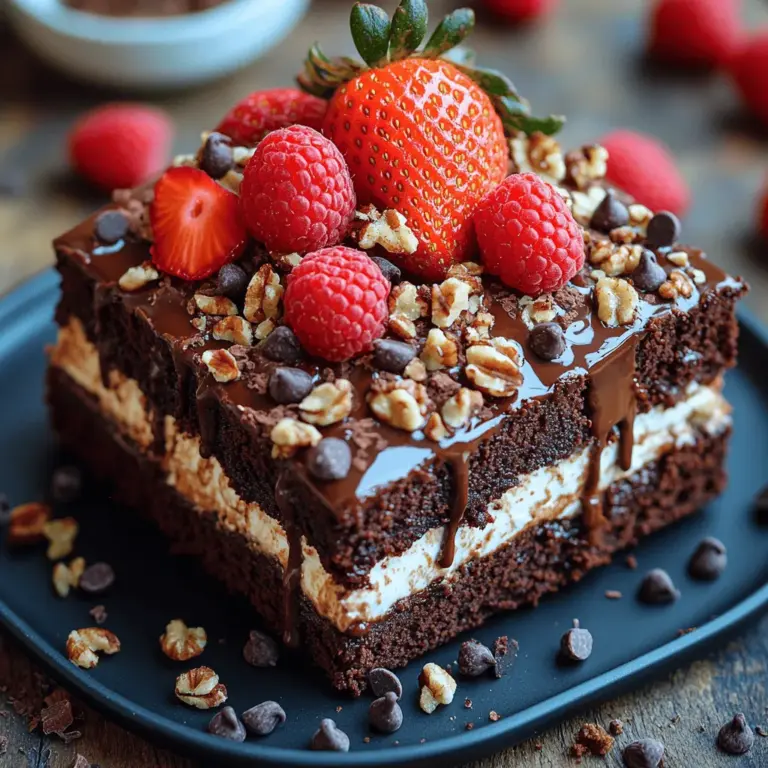
– Fresh Berries: Perfect for garnish, fresh berries add color and freshness to the dessert. They provide a tart contrast to the sweetness of the cake, balancing the flavors and making the presentation truly stunning.
Preparing the Brownies
Step-by-Step Instructions for Perfect Brownies
The first step in creating the Decadent Chocolate Delight: Brownie Refrigerator Cake is to prepare the brownies. A well-made brownie serves as the perfect base for the creamy layers that follow. Here’s how to ensure your brownies turn out just right:
– Preheating the Oven: One of the most critical steps in baking is preheating the oven to the correct temperature. For brownie mixes, this is typically set to 350°F (175°C). A properly heated oven ensures even baking, resulting in brownies that are chewy and moist.
– Mixing the Ingredients: Follow the package instructions for the brownie mix. Generally, you will need to combine the mix with eggs, oil, and water. Mix until just combined; overmixing can lead to tough brownies. If you’re using additional ingredients like nuts or chocolate chips, fold them in gently.
– Baking Time: Pour the brownie batter into a greased or lined baking pan, and place it in the preheated oven. Bake according to the package instructions, usually around 20-25 minutes. It’s essential to keep an eye on them; you want the edges to be set while the center remains slightly soft. To check for doneness, insert a toothpick into the center; it should come out with a few moist crumbs but not wet batter.
– Cooling Process: Once baked, remove the brownies from the oven and allow them to cool in the pan for about 10-15 minutes. Afterward, transfer them to a wire rack to cool completely. It’s crucial to let the brownies cool before slicing them. If they are still warm, they may crumble or break apart when you try to cut them.
Creating the Creamy Mixture
Whipping Up the Perfect Cream
Now that the brownies are prepared and cooled, it’s time to create the creamy mixture that will layer beautifully atop the brownies. This step is pivotal in achieving the delightful texture and flavor that defines the Decadent Chocolate Delight: Brownie Refrigerator Cake.
– Importance of Soft Peaks: Begin by pouring the heavy whipping cream into a mixing bowl. Using an electric mixer, whip the cream on medium speed until it begins to thicken. Gradually add the powdered sugar and vanilla extract, continuing to whip until soft peaks form. Soft peaks mean that the cream holds its shape but is still smooth and slightly droopy. This consistency is perfect for folding into the mascarpone cheese without deflating the mixture.
As we progress through this recipe, you will see how each step contributes to the overall decadent nature of this cake. The combination of rich brownie layers and creamy fillings creates a dessert that is not only visually appealing but also irresistible to chocolate lovers. Stay tuned as we continue with the next steps to assemble this delightful cake, ensuring that every bite is a perfect blend of flavors and textures.
{{image_1}}
Combining Ingredients: How Mascarpone Cheese Enhances the Cream
The rich, creamy texture of mascarpone cheese is a game-changer in the world of desserts. When making the cream layer for your Decadent Chocolate Delight: Brownie Refrigerator Cake, incorporating mascarpone cheese not only enhances the flavor but also provides a luxurious mouthfeel that complements the dense brownies. Mascarpone is an Italian cream cheese that boasts a rich, buttery taste, and its high-fat content ensures that your cream layer is both smooth and indulgent.
To create the cream, start by blending mascarpone with heavy cream and powdered sugar until the mixture is light and fluffy. This combination establishes a perfect balance between sweetness and creaminess, making each layer of the cake an experience in itself. The mascarpone’s subtle sweetness allows the chocolate flavor to shine through while providing a silky texture that melts in your mouth.
Gentle Folding Technique: Preserving the Airy Texture
After whipping the mascarpone and heavy cream, the next crucial step is to gently fold the mixture. This technique is vital to maintaining the airy texture that makes your cream layer so light. Using a spatula, carefully incorporate the whipped cream into the mascarpone mixture in a circular motion. This ensures that you retain as much of the air as possible, resulting in a fluffy cream that will elevate your cake.
Remember to fold gently—over-mixing can lead to a dense, heavy cream that won’t provide the desired contrast against the rich, fudgy brownies. The goal is to maintain the lightness while ensuring that the mascarpone is evenly distributed throughout the cream layer. This step is essential for creating a cake that feels decadent without being overly heavy.
Layering the Cake: Building the Layers for Maximum Flavor
Choosing the Right Dish: Recommendations for Serving
Selecting the right dish for assembling your Brownie Refrigerator Cake is important for both aesthetics and functionality. A glass trifle dish or a rectangular baking pan works well, allowing you to showcase the beautiful layers of brownies and cream. The transparency of a glass dish gives your guests a sneak peek of the deliciousness to come, while a rectangular pan simplifies the layering process and is easier to cut into neat squares.
Whichever dish you choose, ensure that it is large enough to accommodate multiple layers while still leaving room for a final layer of cream on top. This will give your cake a polished look and provide a beautiful canvas for garnishing before serving.
Layering Strategy: Starting with Brownies and Alternating Components
The layering process is where the magic happens. Start by placing a generous layer of brownies at the bottom of your dish. The richness of the brownies sets a solid foundation for the cake. Next, spread an even layer of the mascarpone cream mixture over the brownies, allowing it to fill in any gaps and create a smooth surface.
Continue this process by alternating layers of brownies and cream, ensuring that the brownies remain moist and the cream stays light and airy. Depending on the height of your dish and the number of layers you want, you may repeat this process two to three times. The final layer should always be the mascarpone cream, which not only adds a beautiful finish but also ensures that each slice reveals the luscious layers of brownie and cream.
Importance of the Final Layer: Cream as the Finishing Touch
The final layer of cream is crucial, as it acts as the showstopper for your cake. Not only does it visually enhance the dessert, but it also serves as a canvas for your garnishes. A smooth, thick layer of mascarpone cream on top signals that the cake is rich and indulgent.
To achieve this, use a spatula to spread the cream evenly across the top, creating a slight dome to prevent any toppings from sliding off. This finishing touch not only elevates the dessert’s visual appeal but also ensures that every bite of cake is met with the delightful taste of creamy mascarpone.
Chilling the Cake: The Role of Refrigeration in Flavor Development
Recommended Chilling Time: Why Longer is Better
After layering your cake, the next step is to refrigerate it. Chilling the cake is not just a matter of setting the layers; it plays a pivotal role in flavor development. For the best results, aim for a chilling time of at least four hours, although overnight is even better.
Allowing the cake to sit in the refrigerator gives the flavors time to meld together, creating a harmonious taste experience. The chocolate and cream infuse into one another, enhancing the overall richness. Moreover, the chilling process firms up the layers, making the cake easier to slice and serve.
Covering the Cake: Ensuring Freshness and Flavor Melding
As you prepare to chill your cake, it’s important to cover it with plastic wrap or a lid. This not only prevents the cake from absorbing any unwanted odors from the refrigerator but also retains its moisture. A well-covered cake will stay fresh, ensuring that each slice is just as delectable as the first.
The Science Behind Chilling: How it Helps in Setting the Dessert
The science of chilling revolves around temperature and texture. As the cake cools, the mascarpone cream solidifies, leading to a dessert that can be sliced cleanly without falling apart. Additionally, the chilling process allows the sugars to dissolve and the flavors to develop fully, creating a richer taste profile. The contrast between the dense brownies and the creamy layer becomes more pronounced, making every bite an extraordinary experience.
Serving Suggestions: Presenting Your Decadent Chocolate Delight
Garnishing with Fresh Berries: Adding Color and Freshness
Presentation is key when it comes to serving your Brownie Refrigerator Cake. To elevate its appearance, consider garnishing with fresh berries. Raspberries, strawberries, or blueberries not only add a burst of color but also a refreshing tartness that balances the richness of the chocolate and cream.
Arrange the berries artfully on top of the cream layer or serve them alongside each slice to enhance the visual appeal. The contrast of vibrant colors against the dark chocolate will make your dessert irresistible.
Chocolate Syrup Drizzle: Enhancing the Visual Appeal
For an added touch of decadence, drizzle chocolate syrup over the top of the cake just before serving. This not only enhances the visual appeal but also adds an extra layer of chocolate flavor. Use a squeeze bottle or a spoon to create elegant swirls or lines, allowing the syrup to pool slightly around the edges of the cake.
Cutting Techniques: Achieving Perfect Squares for Serving
To achieve perfectly cut squares, use a sharp knife that has been dipped in hot water to warm the blade. Wipe the knife clean between cuts to ensure clean edges. This technique prevents the brownies from crumbling and keeps the layers intact, providing a beautiful presentation for your guests.
Taste and Texture Experience: Describing the Sensation of Each Bite
Contrast of Rich Chocolate and Creamy Layers
When you take a bite of the Decadent Chocolate Delight, your taste buds will be treated to a harmonious blend of flavors and textures. The rich chocolate flavor of the brownies pairs perfectly with the light, creamy mascarpone layer. This contrast creates a delightful experience, as the intense chocolate flavor envelops your palate, followed by the smooth cream that melts away.
The Crunch of Nuts: Adding a Delightful Texture
If you’ve opted to include nuts, such as walnuts or pecans, you’ll experience an added crunch that complements the soft layers. The nuts provide a delightful texture that contrasts beautifully with the creamy and fudgy elements of the cake, enhancing the overall experience and making each bite uniquely satisfying.
Overall Experience: The Melt-in-Your-Mouth Quality
The culmination of flavors and textures in this dessert results in a melt-in-your-mouth quality that is simply irresistible. Each layer works together to create a cohesive experience, making the Brownie Refrigerator Cake not just a treat but a celebration of chocolate and cream.
Conclusion: A Celebration of Chocolate and Cream
The Decadent Chocolate Delight: Brownie Refrigerator Cake is more than just a dessert; it’s an experience that brings people together around the joy of chocolate. Its simplicity in preparation combined with the luxurious outcome makes it a must-try for gatherings or a sweet treat at home. By following the steps outlined in this article, you can create a stunning dessert that is sure to impress, allowing you to savor every bite of this delightful chocolate creation. Whether served at a special occasion or enjoyed as a weekday indulgence, this cake promises to deliver a memorable experience that will leave your guests craving more. Make this recipe your own, and share the joy of chocolate with family and friends.
