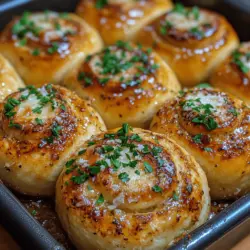
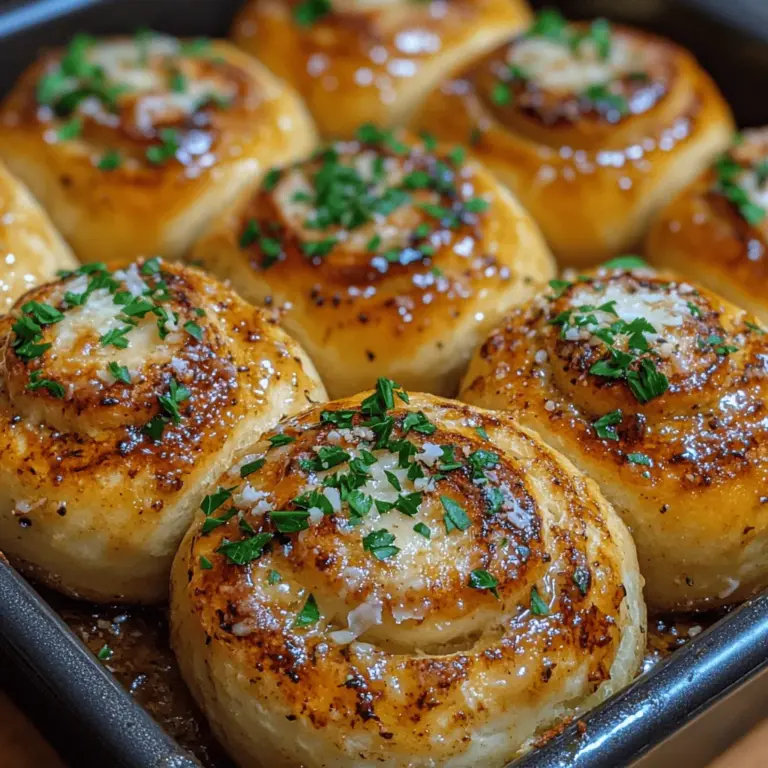
When it comes to the world of bread, few things can match the comforting aroma and delightful taste of freshly baked garlic bread rolls. These rolls are not just a side dish; they are a culinary experience that can elevate any meal. Imagine sinking your teeth into a soft, pillowy roll infused with the aromatic flavors of garlic and herbs, all while enjoying the satisfaction that comes from homemade bread. Whether served alongside a hearty pasta dish, enjoyed as a snack, or presented as an appetizer at your next gathering, garlic bread rolls are versatile enough to complement any occasion.
The beauty of making garlic bread rolls lies not only in their taste but also in the joy of baking. The process of kneading dough and watching it rise is therapeutic and fulfilling, making the final product all the more rewarding. With each bite, you’ll experience a harmonious blend of flavors and textures, including the buttery richness and a hint of fresh herbs that make these rolls truly irresistible.
Understanding the Ingredients
Before we dive into the step-by-step instructions for making these delicious garlic bread rolls, it’s essential to understand the key ingredients that contribute to their unique flavor and texture. Each component plays a vital role in creating the perfect roll, so let’s explore them in detail.
All-Purpose Flour
All-purpose flour is the foundation of our garlic bread rolls, providing the necessary structure and texture to the dough. It’s a versatile ingredient that works well for many baked goods, making it a staple in most kitchens. When measuring flour, it’s crucial to do so accurately to ensure the right dough consistency. A common method is the spoon-and-level technique: fluff the flour in the container, spoon it into a measuring cup, and then level it off with a knife. This prevents the flour from becoming compacted, which can lead to overly dense rolls.
Instant Yeast
Instant yeast is a key player in the bread-making process, known for its ability to rise quickly and efficiently. Unlike active dry yeast, which requires proofing in warm water before use, instant yeast can be mixed directly with dry ingredients. This not only saves time but also simplifies the baking process. When using instant yeast, you can expect a quicker rise, making it ideal for those who want to enjoy homemade bread without spending hours waiting for it to proof.
Sugar and Salt
Both sugar and salt serve crucial roles in enhancing the flavor of the rolls. Sugar acts as food for the yeast, promoting fermentation and contributing to the dough’s rise. It also adds a hint of sweetness that balances the savory elements of garlic and herbs. Salt, on the other hand, is essential for flavor enhancement and helps to control the fermentation process. It strengthens the gluten structure in the dough, resulting in a soft, chewy texture. When adding sugar and salt, it’s important to ensure they are evenly distributed throughout the dry ingredients for optimal results.
Warm Water
Warm water is another vital ingredient that activates the yeast and helps to create the desired dough consistency. The ideal temperature for activating yeast is between 100°F and 110°F (38°C to 43°C). If the water is too hot, it can kill the yeast, while water that is too cool may not activate it effectively. To test the temperature, you can use a kitchen thermometer or check it with your wrist; it should feel warm but not hot. The right water temperature ensures the yeast thrives, which is essential for achieving soft and fluffy rolls.
Butter and Garlic
Unsalted butter is a key flavor component in garlic bread rolls, contributing richness and moisture to the dough. It adds a delicious buttery flavor that enhances the overall taste of the rolls. Additionally, garlic is the star ingredient that brings an aromatic punch to the recipe. Fresh garlic, when minced or crushed, releases oils that infuse the dough with a robust flavor. Beyond its culinary appeal, garlic also boasts numerous health benefits, including anti-inflammatory and immune-boosting properties. Together, butter and garlic create a mouthwatering combination that makes these rolls a standout.
Fresh Parsley and Black Pepper
To elevate the flavor profile of the garlic bread rolls, we incorporate fresh parsley and black pepper. Fresh parsley adds a burst of color and a mild earthy flavor that complements the garlic without overpowering it. It also contributes a refreshing note, making the rolls more vibrant. Black pepper, on the other hand, introduces a subtle heat and complexity to the mix. The combination of these two ingredients enhances the overall flavor experience, ensuring that each bite is packed with deliciousness.
Optional Parmesan Cheese
For those who crave an extra layer of flavor, consider adding freshly grated Parmesan cheese to the dough or as a topping. Parmesan brings a savory richness that enhances the garlic and butter, creating an indulgent treat. Its umami notes blend beautifully with the other ingredients, making these rolls even more irresistible. Plus, the cheese melts beautifully, creating a delightful crust on top of each roll. Whether you choose to include it or not, the option for Parmesan allows for customization based on your taste preferences.
Step-by-Step Instructions
Now that we’ve covered the essential ingredients, let’s move on to the step-by-step instructions for making these irresistible garlic bread rolls. Follow these detailed steps to ensure your rolls turn out perfectly every time.
Activating the Yeast
The first step in making garlic bread rolls is activating the yeast. Begin by measuring out warm water (remember to keep it between 100°F and 110°F) and pouring it into a mixing bowl. Sprinkle in the instant yeast along with a teaspoon of sugar, which will help to feed the yeast. Allow this mixture to sit for about 5 to 10 minutes. During this time, you should see small bubbles forming on the surface, indicating that the yeast is alive and active. If there are no bubbles after this time, it may mean that the yeast is old or the water temperature was incorrect, and you may need to start over with fresh ingredients.
Mixing Dry Ingredients
While the yeast is activating, it’s a good time to prepare the dry ingredients. In a separate large mixing bowl, combine the all-purpose flour, the remaining sugar, and salt. Use a whisk or a fork to mix these ingredients thoroughly, ensuring that the sugar and salt are evenly distributed throughout the flour. This step is crucial for achieving a uniform dough, as it ensures that each roll will have the same flavor and texture.
Dough Formation
Once the yeast has been activated, it’s time to combine the wet and dry ingredients. Pour the yeast mixture into the bowl with the dry ingredients. Add the melted unsalted butter and minced garlic at this stage, mixing everything together until a shaggy dough begins to form. You can use a wooden spoon or your hands for this process, ensuring that all the flour is incorporated.
As you mix, pay attention to the texture of the dough. It should come together but may still be a bit sticky; this is perfectly normal. If the dough feels too wet, you can gradually add a little more flour, one tablespoon at a time, until it reaches a smooth consistency. Conversely, if it seems too dry, you can add a teaspoon of warm water until the desired texture is achieved.
Kneading the Dough
After forming the dough, transfer it to a lightly floured surface for kneading. Kneading is essential for developing the gluten, which gives the rolls their structure and chewiness. To knead the dough, fold it over itself, push it down with the heel of your hand, and then rotate it 90 degrees. Repeat this process for about 8-10 minutes until the dough is smooth and elastic. You can test if the dough is ready by performing the “windowpane test”: stretch a small piece of dough between your fingers; if it forms a thin membrane without tearing, it’s ready for the next step.
After kneading, place the dough in a lightly greased bowl, covering it with a clean kitchen towel or plastic wrap. Allow it to rise in a warm, draft-free environment for about 1 to 1.5 hours, or until it has doubled in size. This rising period is crucial for developing the flavor and texture of the rolls, so be patient and let the dough work its magic.
Stay tuned for the next part of this article, where we will continue with the shaping, second rise, and baking of these delectable garlic bread rolls!
{{image_1}}
Kneading the Dough
Kneading the dough is a crucial step in the bread-making process, as it develops gluten, which gives bread its structure and chewiness. When you knead, you are essentially aligning the gluten strands in the dough. This alignment helps create a strong network that traps gases produced by yeast during fermentation.
To knead effectively, you can use the traditional method by hand or opt for a stand mixer with a dough hook. If you’re kneading by hand, place the dough on a floured surface, fold it over itself, and push it down with the palm of your hand. Turn the dough a quarter turn and repeat. Knead for about 8-10 minutes until the dough is smooth and elastic. A good test for readiness is to perform the “windowpane test”: take a small piece of dough and stretch it gently. If it stretches thin without tearing, the gluten is well-developed.
First Rise
After kneading, it’s time for the first rise, also known as proofing. This step is fundamental as it allows the yeast to ferment and produce carbon dioxide, which causes the dough to rise. The ideal temperature for proofing dough is around 75°F to 80°F (24°C to 27°C). This warmth encourages yeast activity, while a cooler environment may slow it down.
To create the perfect proofing environment, place the dough in a lightly greased bowl and cover it with a damp cloth or plastic wrap to prevent it from drying out. Let it rise until it has doubled in size, which usually takes about 1 to 1.5 hours depending on the ambient temperature. Keep an eye on the dough; if it’s rising too quickly, it may be too warm, and if it’s rising too slowly, it may need a warmer spot.
Preparing Garlic Butter
While the dough is rising, it’s the perfect time to prepare the garlic butter that will elevate the flavor of your rolls. For this, you will need unsalted butter, minced garlic, fresh parsley, and a pinch of salt.
Start by melting ½ cup of unsalted butter in a small saucepan over low heat. Once melted, add 3-4 cloves of minced garlic and sauté gently until fragrant, about 1-2 minutes. Be careful not to let the garlic brown, as it can impart a bitter taste. Remove the mixture from heat and stir in 2 tablespoons of freshly chopped parsley and a pinch of salt. This garlic butter will not only add delicious flavor to the rolls but also serve as a glaze for the finished product, giving them a beautiful sheen and extra taste.
Shaping the Rolls
Once the dough has risen, it’s time to shape your rolls. Start by gently punching down the dough to release any trapped gas and then turn it out onto a lightly floured surface. Divide the dough into equal portions; for medium-sized rolls, aim for about 12-15 pieces.
To shape each roll, take a piece of dough and flatten it slightly. Fold the edges toward the center to create a small pouch, then flip it over, seam side down. Cup your hand around the roll and gently rotate it on the counter to create a smooth top. Ensuring uniformity in size will help the rolls bake evenly.
Second Rise
After shaping, place the rolls on a greased baking sheet or in a baking dish, leaving some space between them to allow for further expansion. Cover them with a clean kitchen towel and let them rise again for about 30-45 minutes, or until they have puffed up and are touching each other. This second rise is crucial for achieving the light, fluffy texture characteristic of great bread rolls.
Baking the Rolls
Preheat your oven to 375°F (190°C) during the second rise. Once the rolls have risen adequately, it’s time to bake them. Before placing them in the oven, brush the tops with a bit of the prepared garlic butter mixture. This will help them develop a golden crust and infuse them with flavor.
Bake the rolls for 15-20 minutes, or until they are golden brown on top. To check for doneness, tap the bottom of a roll; if it sounds hollow, they are ready. Be cautious not to overbake, as this can lead to dry rolls.
Finishing Touches
Once out of the oven, brush the rolls generously with the remaining garlic butter mixture while they are still warm. This final touch enhances flavor and adds a glossy finish. For an extra burst of freshness, sprinkle some additional chopped parsley over the top before serving.
—
Serving Suggestions
Garlic bread rolls are incredibly versatile and can complement a variety of meals. Here are a few pairing suggestions:
– Soups: Serve garlic bread rolls alongside hearty soups like minestrone, tomato basil, or creamy potato leek to soak up the flavors.
– Salads: They pair wonderfully with light salads such as Caesar or mixed greens, adding a satisfying crunch.
– Pasta Dishes: These rolls make a perfect accompaniment to pasta dishes, especially those with rich sauces like marinara or alfredo.
For gatherings, present the rolls in a rustic breadbasket lined with a cloth, and consider garnishing with fresh herbs or a sprinkle of grated parmesan for an elegant touch.
Storing and Reheating Garlic Bread Rolls
To maintain the freshness of your garlic bread rolls, store them in an airtight container at room temperature for up to 2 days. If you want to keep them for longer, consider freezing them. Wrap each roll tightly in plastic wrap and place them in a freezer-safe bag. They can last up to 3 months in the freezer.
When ready to enjoy, thaw them at room temperature, then reheat in a preheated oven at 350°F (175°C) for about 10 minutes to revive their soft texture and warm them through. Alternatively, you can microwave them for 15-20 seconds, but be cautious not to overheat, as this can make them tough.
Nutritional Information
Each garlic bread roll (when divided into 15 portions) contains approximately:
– Calories: 150-200
– Carbohydrates: 22g
– Protein: 3g
– Fat: 7g
– Fiber: 1g
These rolls are a delightful treat, but keep in mind that the nutritional value can vary based on the specific ingredients used and portion sizes.
Conclusion
Irresistible garlic bread rolls are a delicious addition to any meal, offering a combination of fluffy texture and robust flavor that appeals to all palates. Whether enjoyed as a side dish or as a snack on their own, these rolls are sure to impress family and friends alike.
Making garlic bread rolls at home is not only a rewarding culinary experience, but it also allows you to customize the flavors to your liking. With the right techniques and a little patience, you can create a batch that is irresistibly good. So roll up your sleeves, gather your ingredients, and embark on this delightful baking adventure—you won’t regret it!


